Documentation
Blob Web Explorer
Blob Web Explorer is a cloud-based service that allows users to manage their Azure Blob Storage Containers through an easy-to-use web interface. The application also provides advanced sharing options that enable users to share their containers with other users securely. With this solution, users can efficiently manage and access their Azure Blob Storage Containers in the cloud, making it an ideal solution for businesses of all sizes.
- Version: 1.2
- Author: ONERiC
- Created: 26 March, 2023
- Update: 26 March, 2023
If you have any questions that are beyond the scope of this help file, Please feel free to email via Contact Page.
Features
Here are the detailed features of Blob Web Exploer the Azure Blob Storage Container Web Explorer SaaS application:
Container Management
Blob Web Explorer allows users to manage their Azure Blob Storage Containers through a Dashboard. Users can easily add new containers with new Alias from any Azure Storage Account. This allows users to aggregate and manage all their blobs in one place.
File Management
The Blob Web Explorer provides users with an intuitive interface to manage files and folders within the containers. Users can upload, download, move, copy, or delete files and folders in the containers.
Search
The Blob Web Explorer provides a search functionality to allow users to search for files and folders within the containers.
Sharing
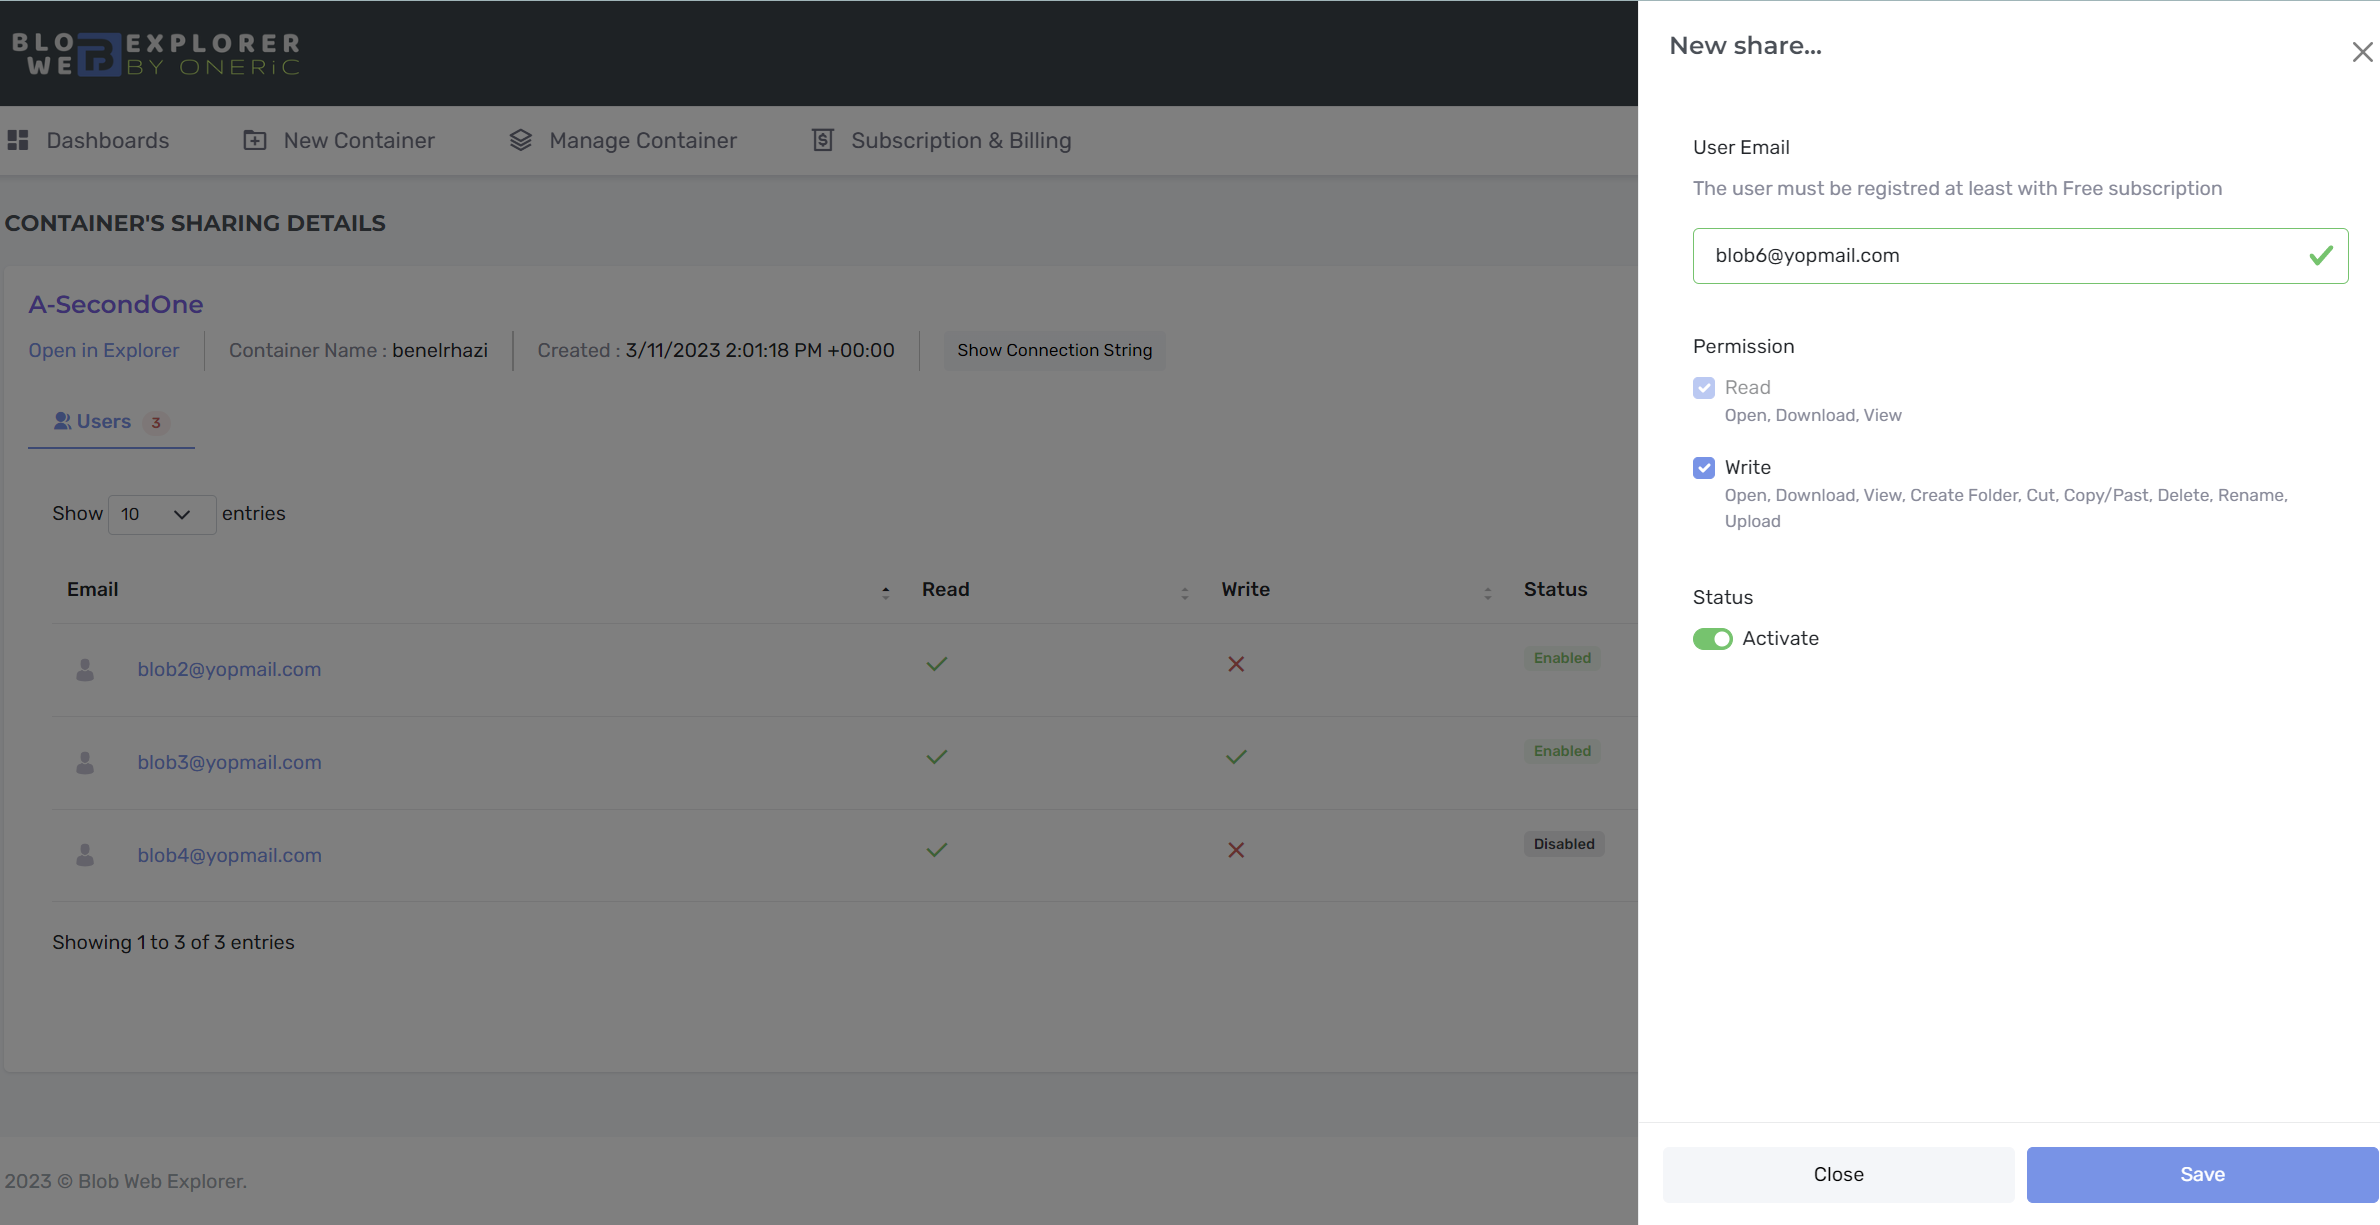
The Blob Web Explorer enables users to share containers with other users registred in the platform just with free plan. No paied plan needed to use shared container as a user.
Accessibility
The Blob Web Explorer enables easy and convenient access to the blob container from anywhere with an internet connection, without requiring any additional software installation.
User-friendly interface
The file explorer interface provides a familiar and intuitive way of interacting with the blob container, making it easier for users to navigate and manage their data.
Time-saving
With the file explorer, users can quickly locate and access the files they need, saving time and improving productivity.
Collaborative
The solution allows multiple users to access the same blob container simultaneously, facilitating collaboration and teamwork.
Scalability
SaaS solutions are highly scalable, so the file explorer can easily handle large amounts of data and grow as the user's needs change.
Security
The solution provides secure access to the blob container, with features such as authentication, authorization, and encryption, ensuring the safety and confidentiality of the data.
Getting Started with Blob Web Explorer
Sign Up
Follow the steps below to signup:
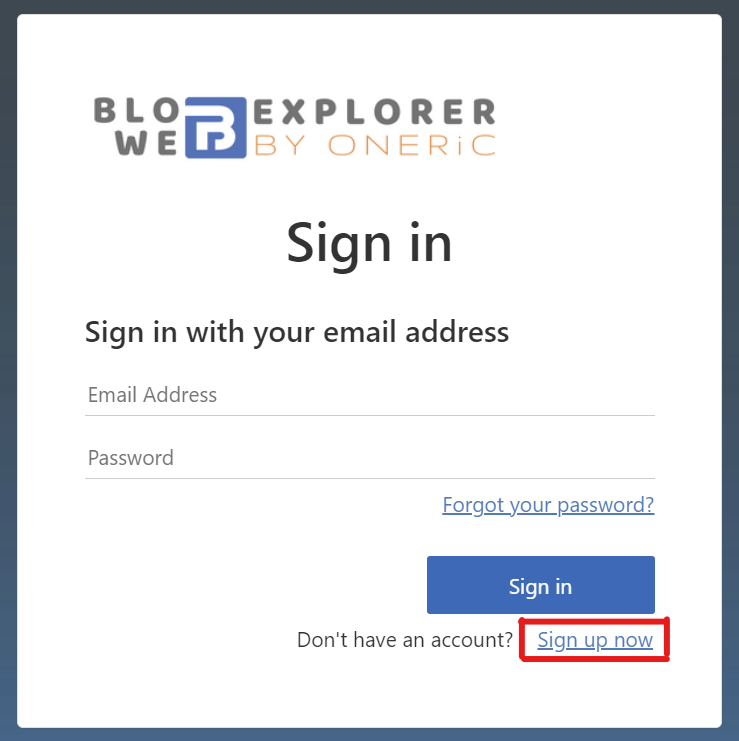
- Connect to blobexplorer.com web app. The Signin/Signup dialog is displayed.
- Click on "Sign up now" link to start registration.
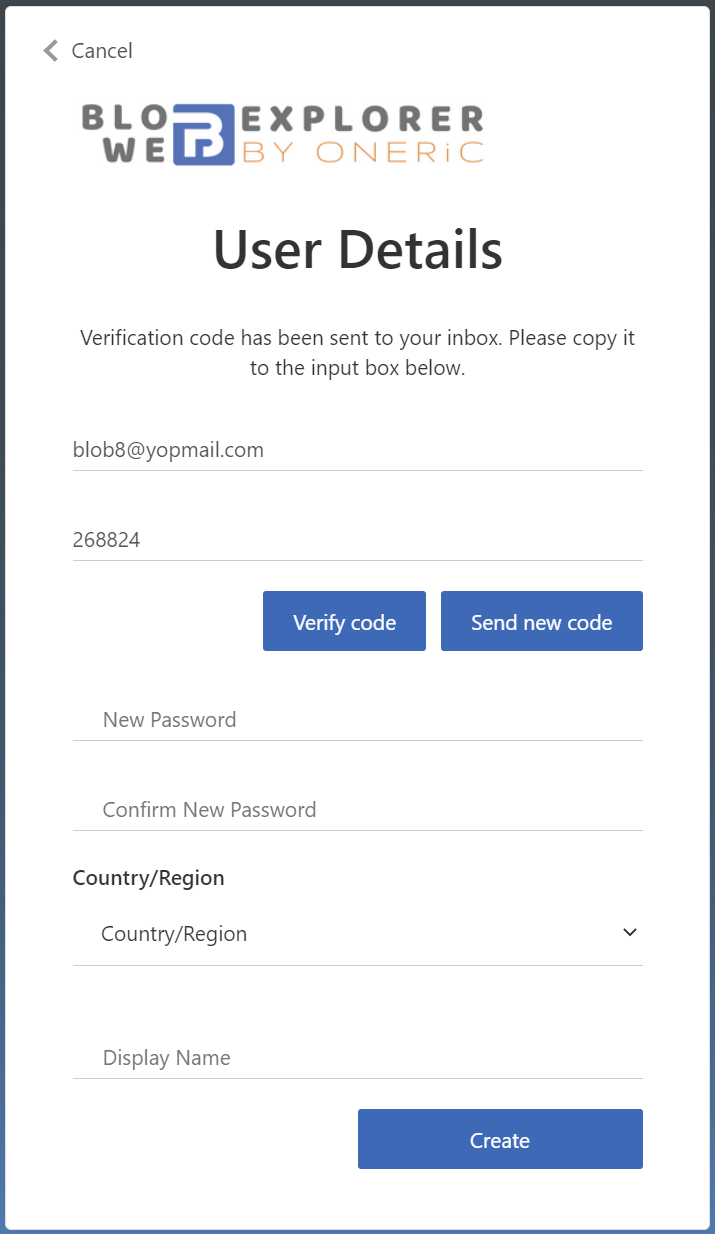
- At this step, you should provide the following information:
- Email Address
- Password
- Your Country
- And your full Name
- First enter your email address and click on "Send verification code" to verify your email.
- You will receive an email verification code in your mailbox.
- Enter the verification code and click on "Verify code".
- After successful code verification, complete the remaining information:
- Provide and confirm a new password.
- Choose your contry from the list.
- Finally, provide your full Name or your company name and click on "Create"
- If the registration goes well, you will be redirected to the application Dashboard.
Add Container
Prerequisites
Before add your container to the application you should have already created an Azure Storage account
in your Azure subscription.
Create an Azure storage account
- Create an Azure Storage Account. See the link above.
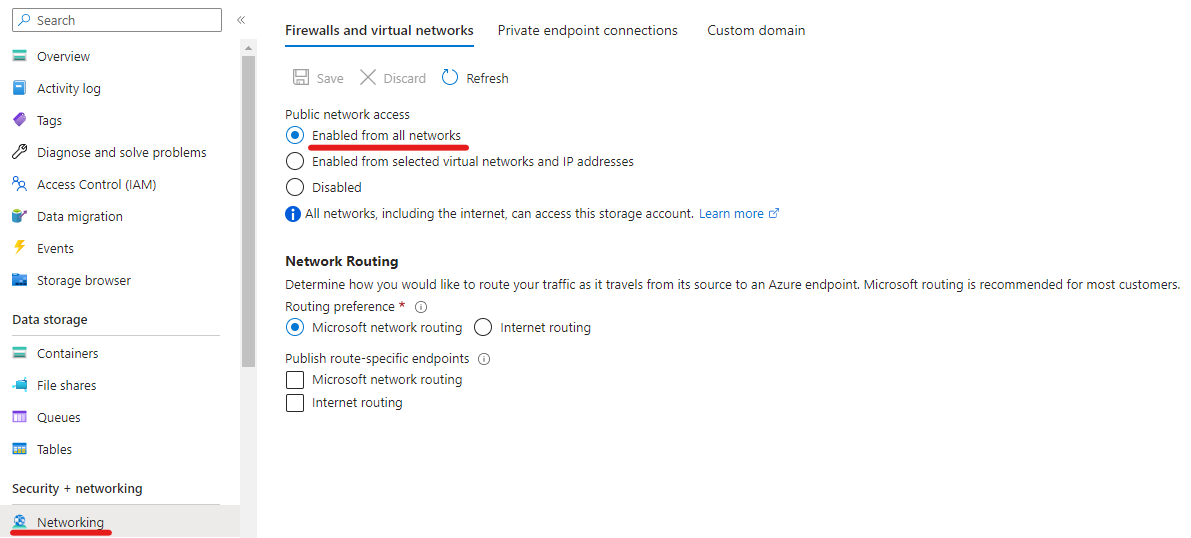
- Ensure that your storage account public network is Enabled from all networks.
- The container Public access level can keep the default value as "Private"
Adding container
- Connect to your account in Blob Web Explorer application blobexplorer.com.
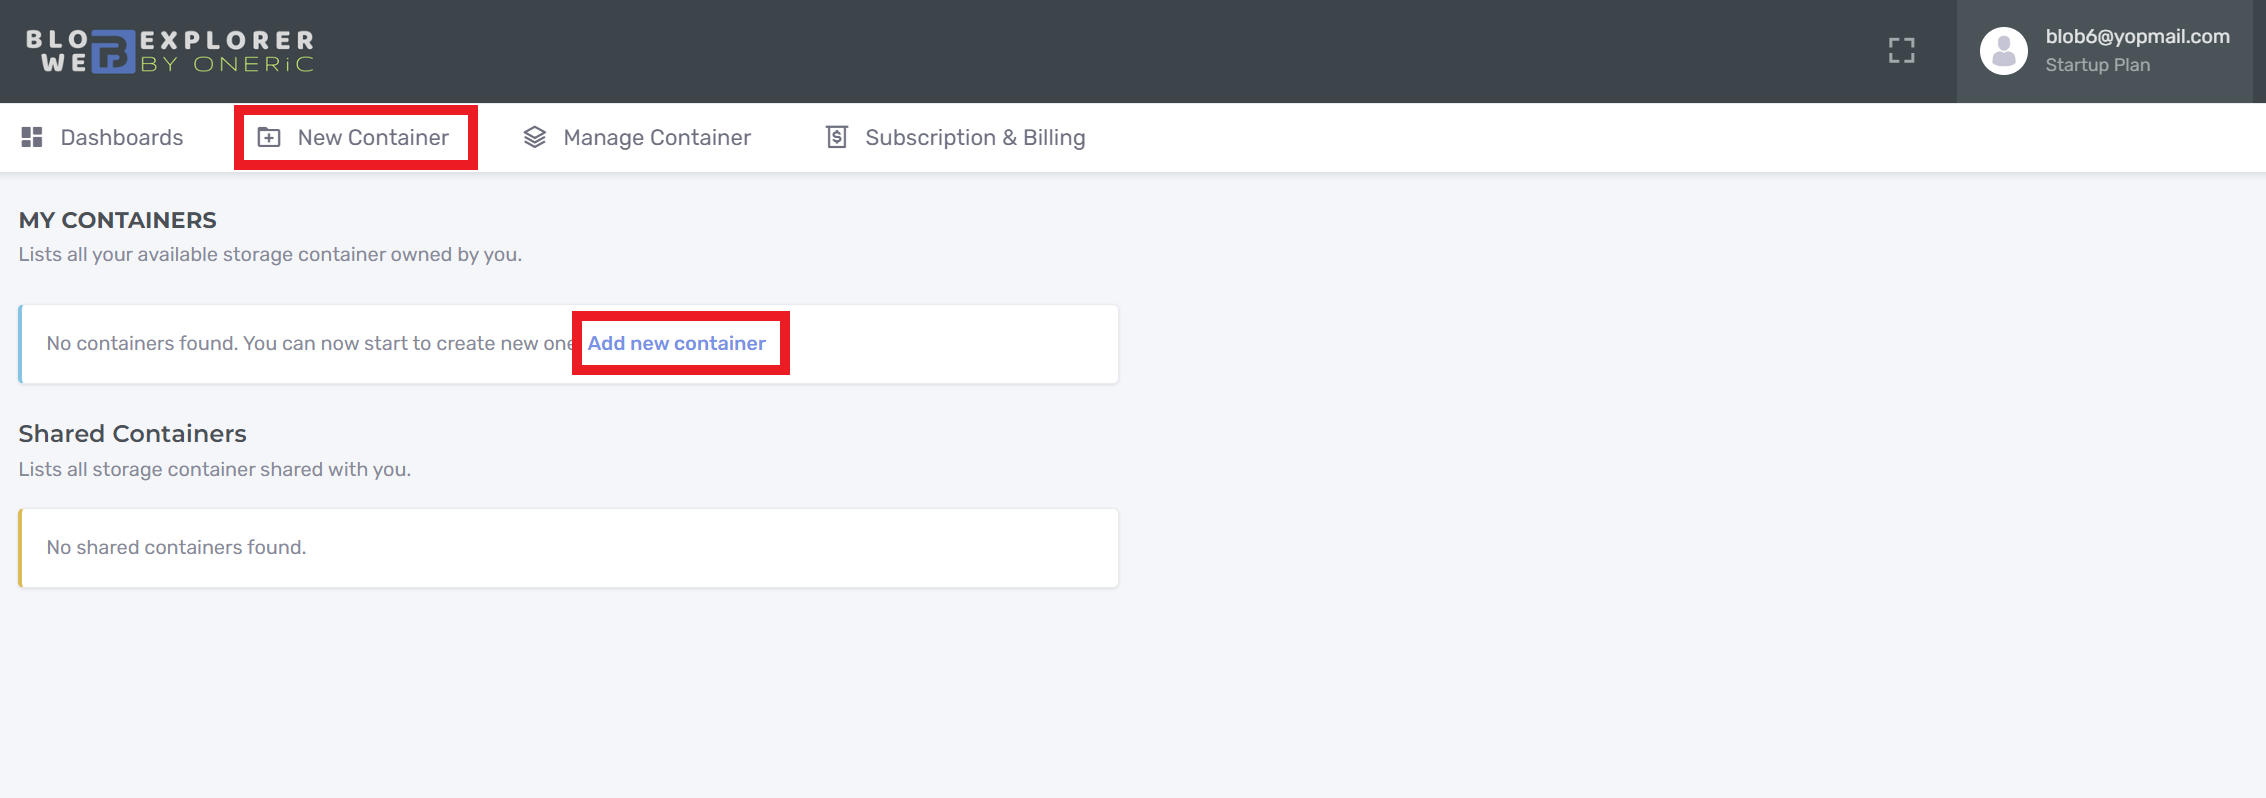
- Click on "New Container" menu or "Add new container" link.
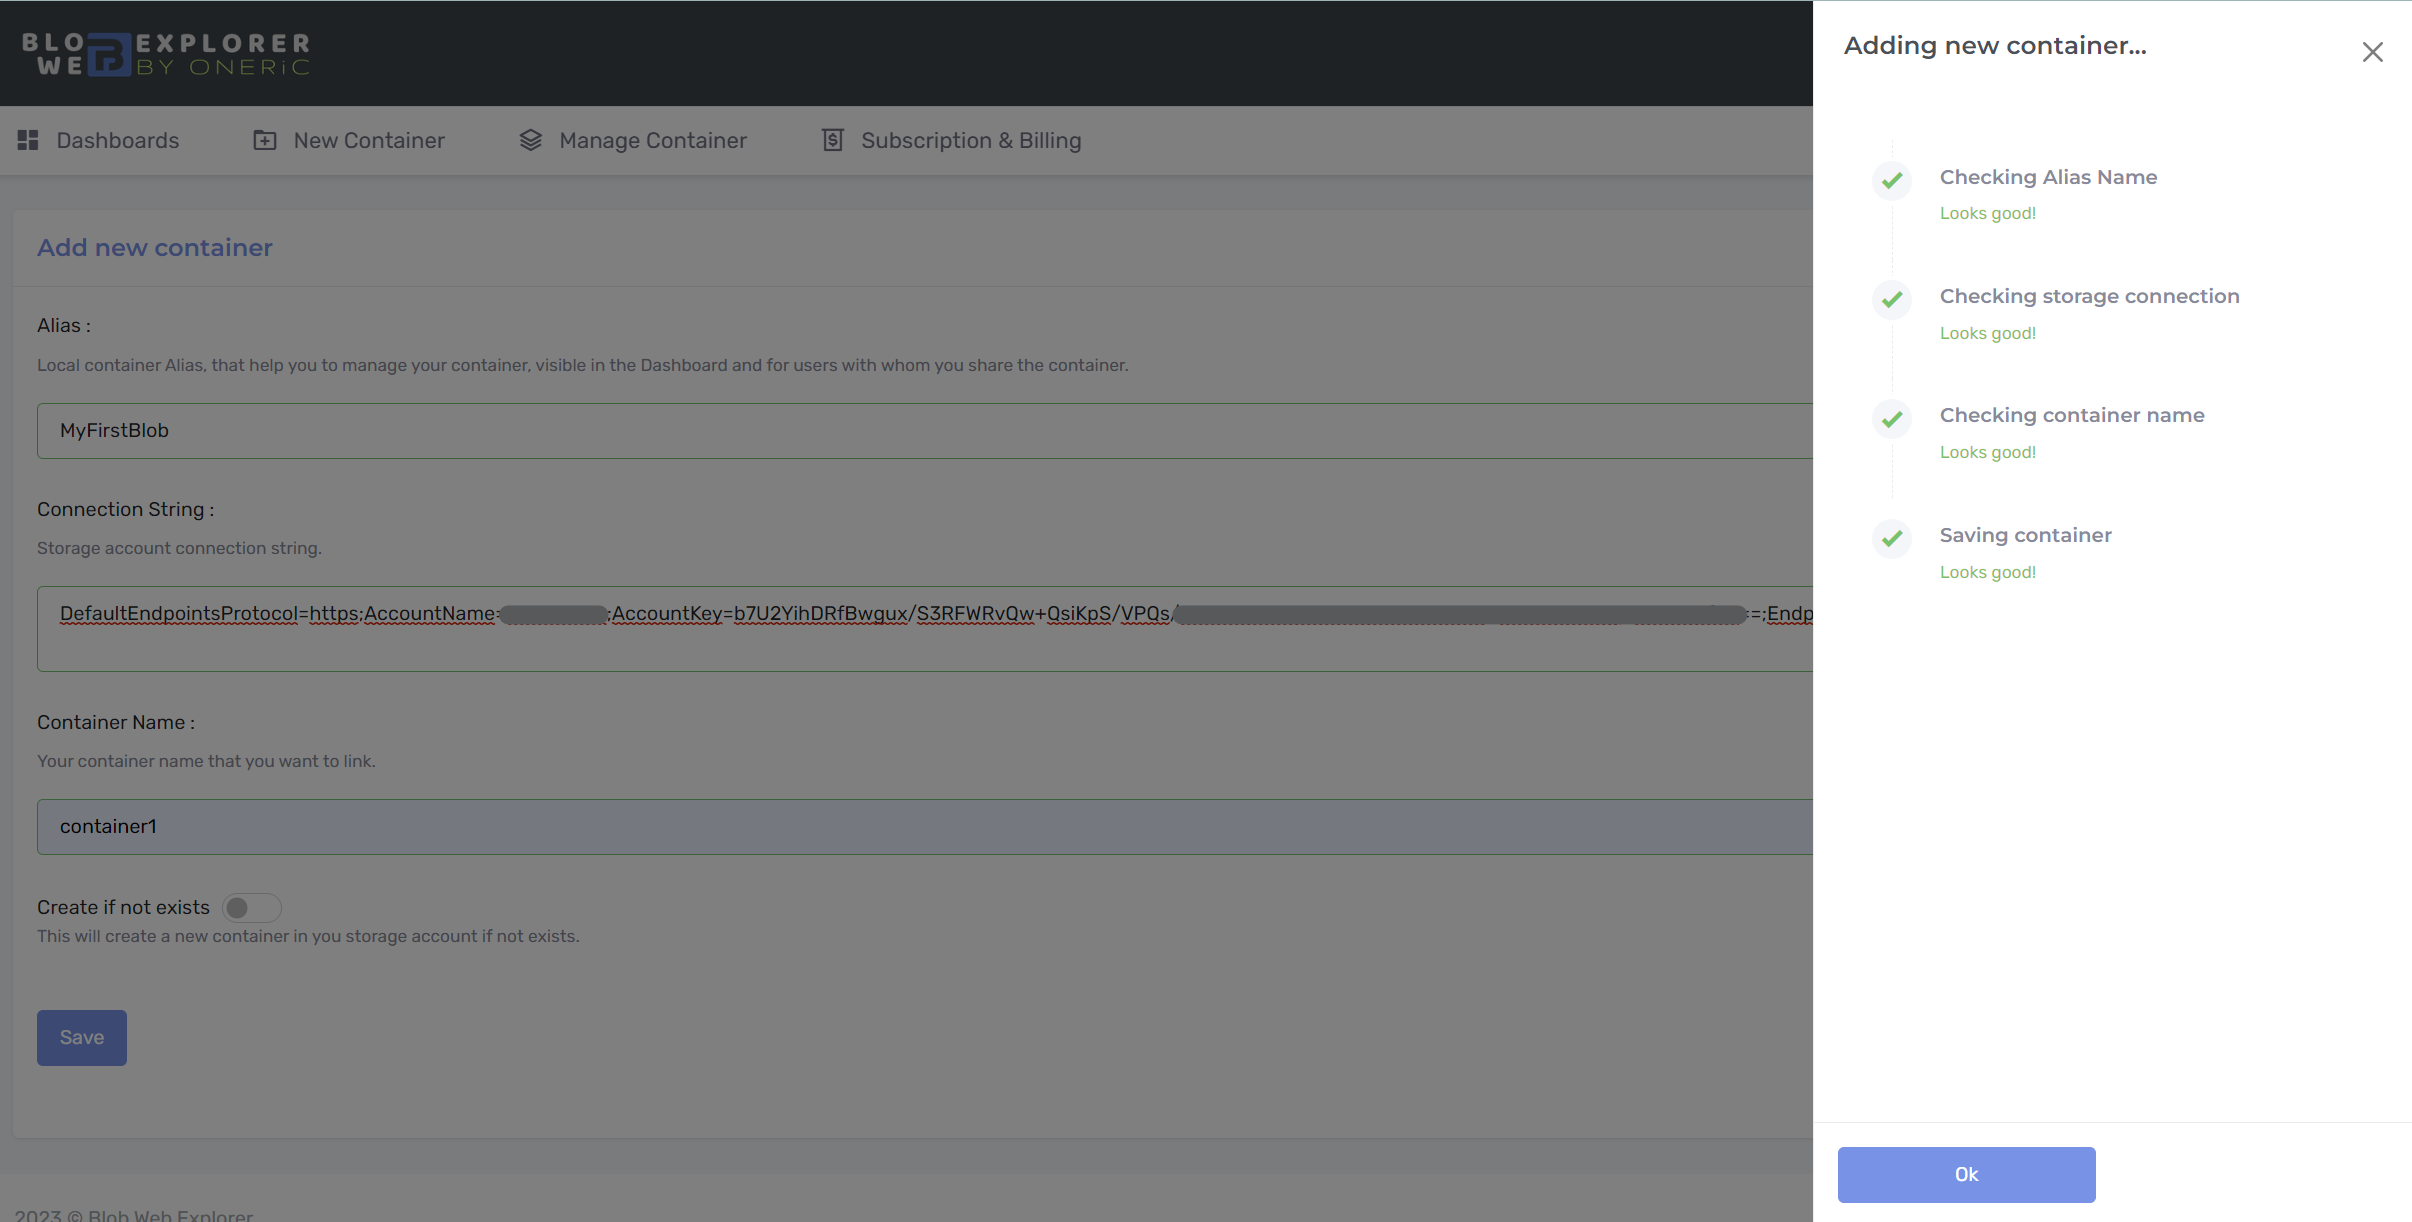
- Add container form is displayed, enter :
- Alias: New Alias affected to your container that help to easly manage and share container. Alias must be unique.
- Connection String: It's your Azure Storage Connection String which allows application to connect to your blob container.
- Container Name: Your Azure Storage Container Name.
- Create if not exists: With this option you can create new container automatically from the Blob Web Explorer application.
- Click on the "Save" button.
- The cheking and saving side-bar will be displayed to inform yoou of the result of the operation.
- If all is well click on "Ok" button. You will be redirected to the Dashboard. And you will see the new container Added.
- Click on Alias to explore your Blob Storage Container.
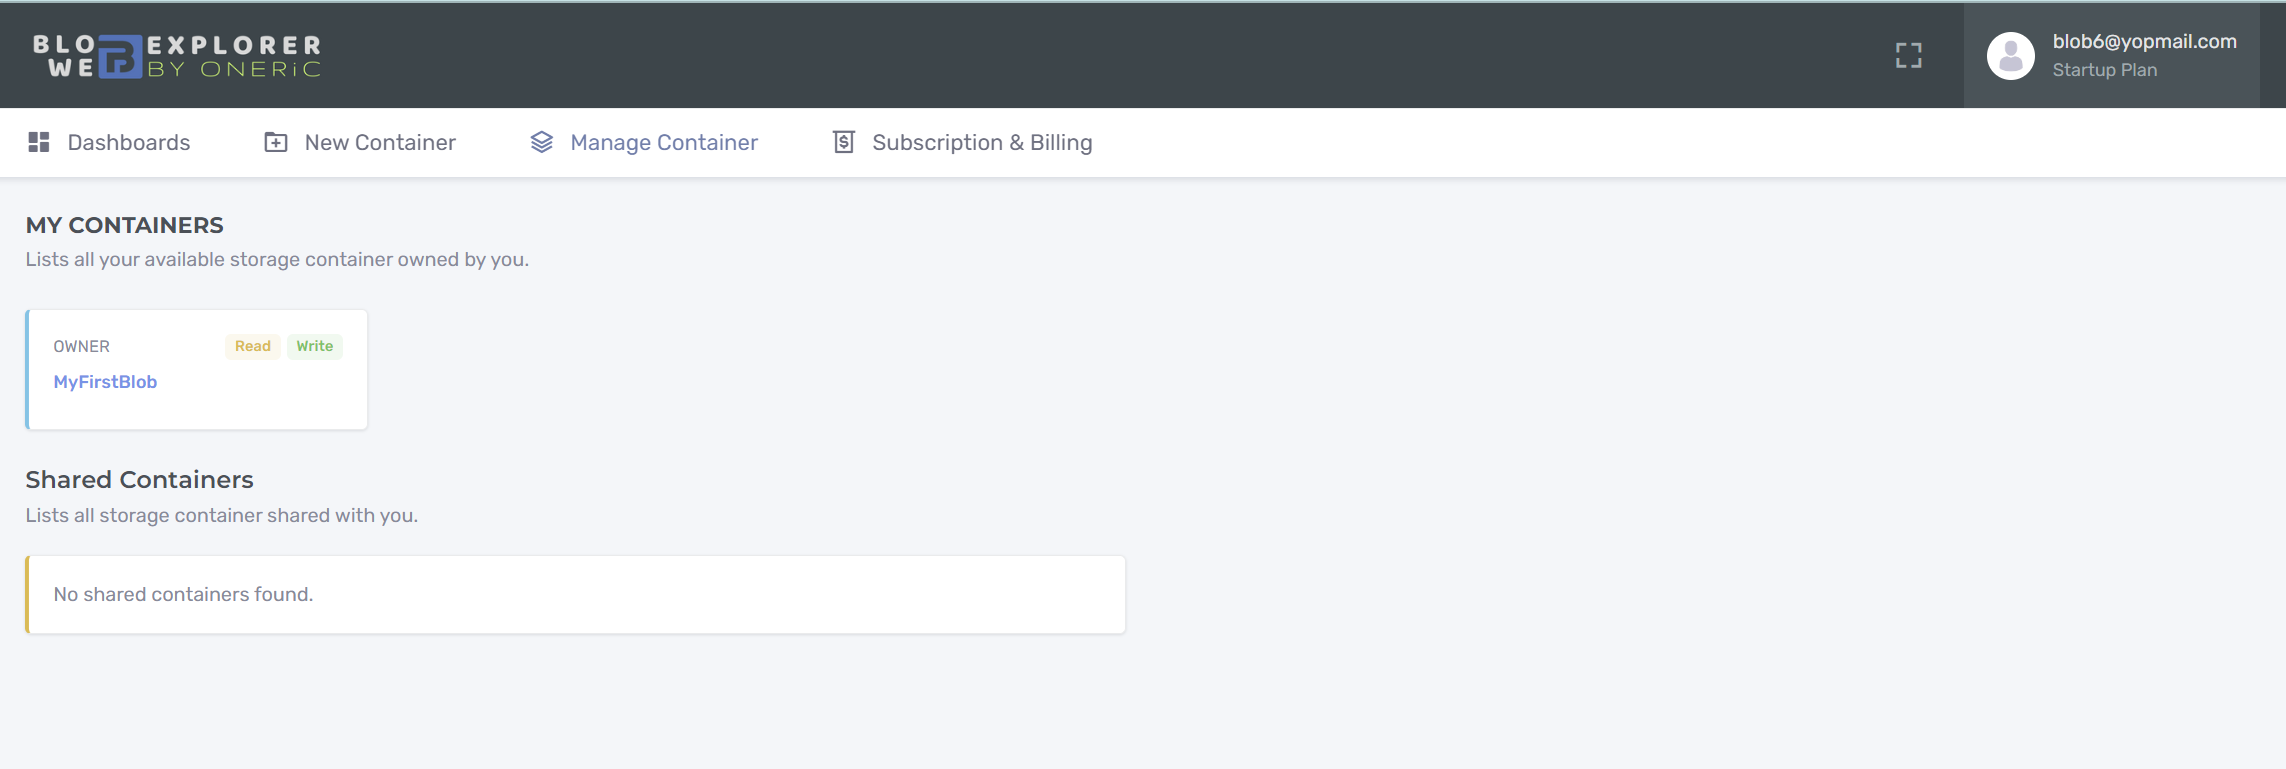
By default you are the Owner of the container that you create. Thus read and write permission will be granted on the Blob Storage Container.
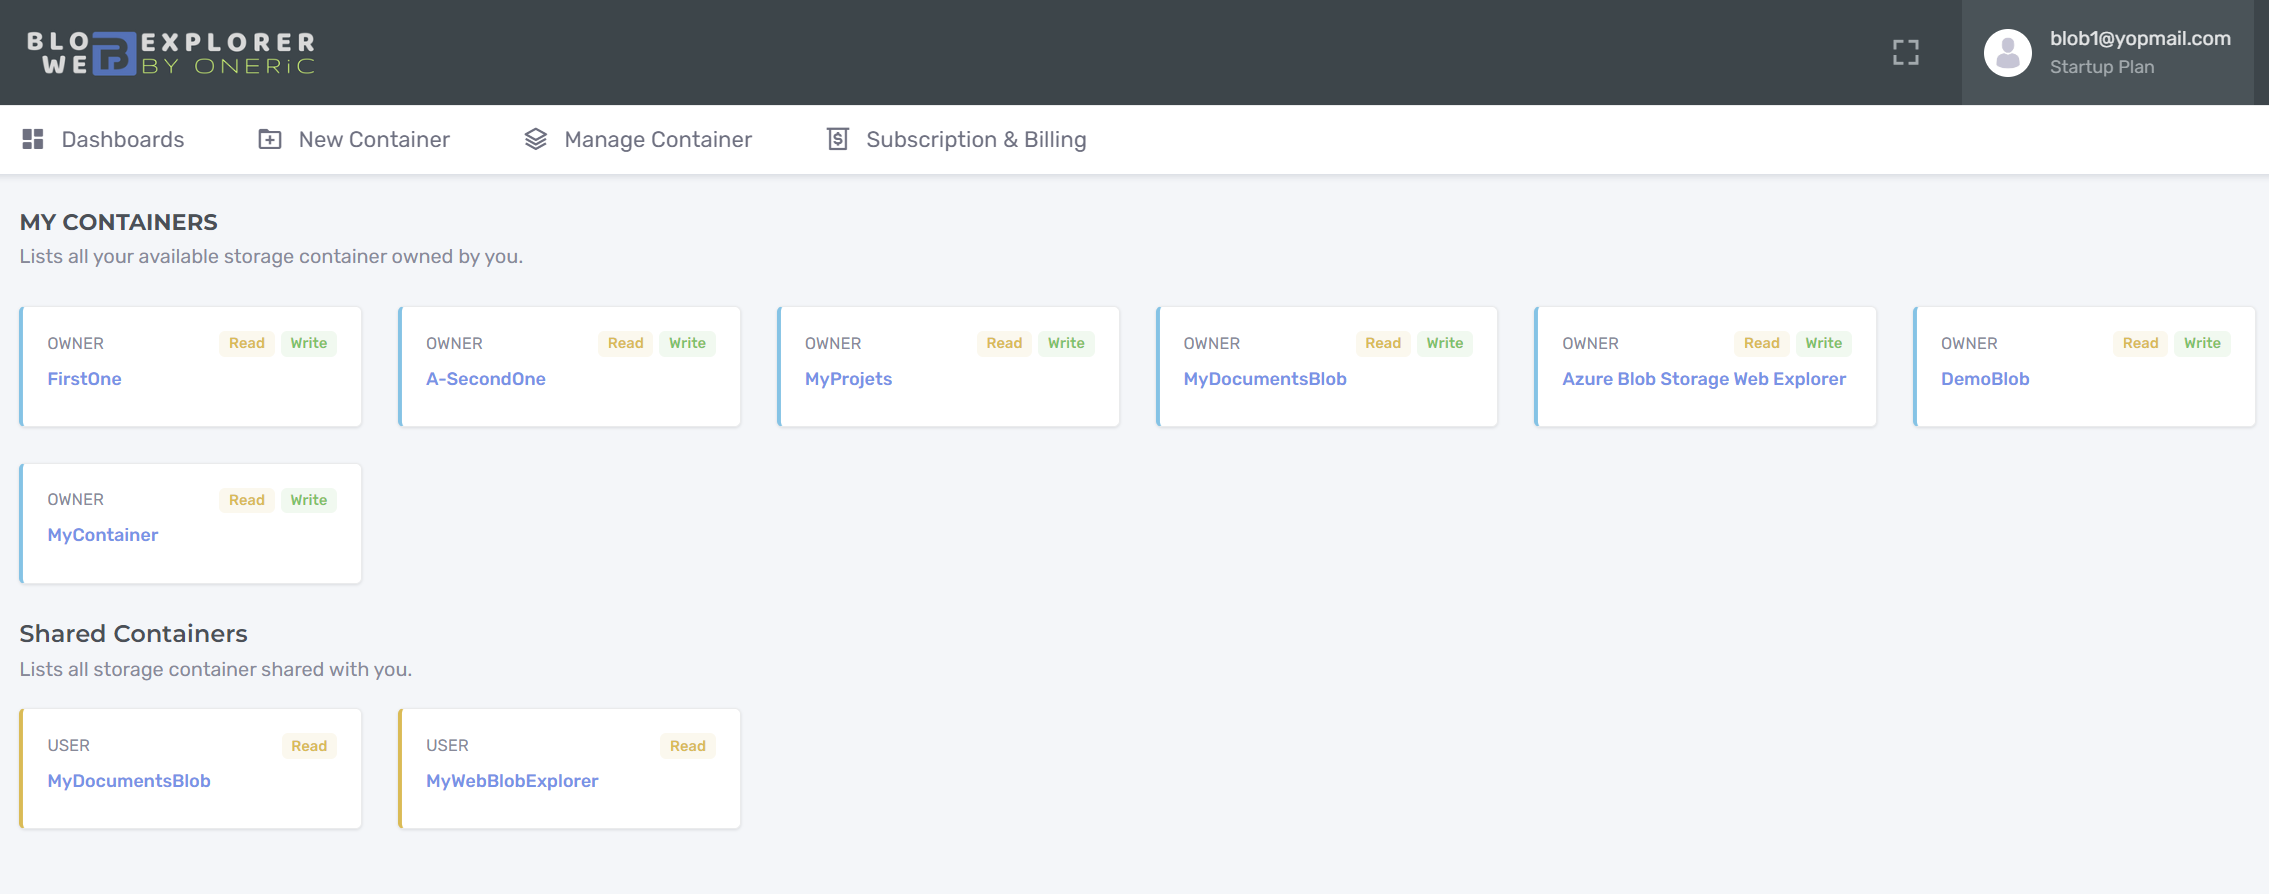
Dashboard
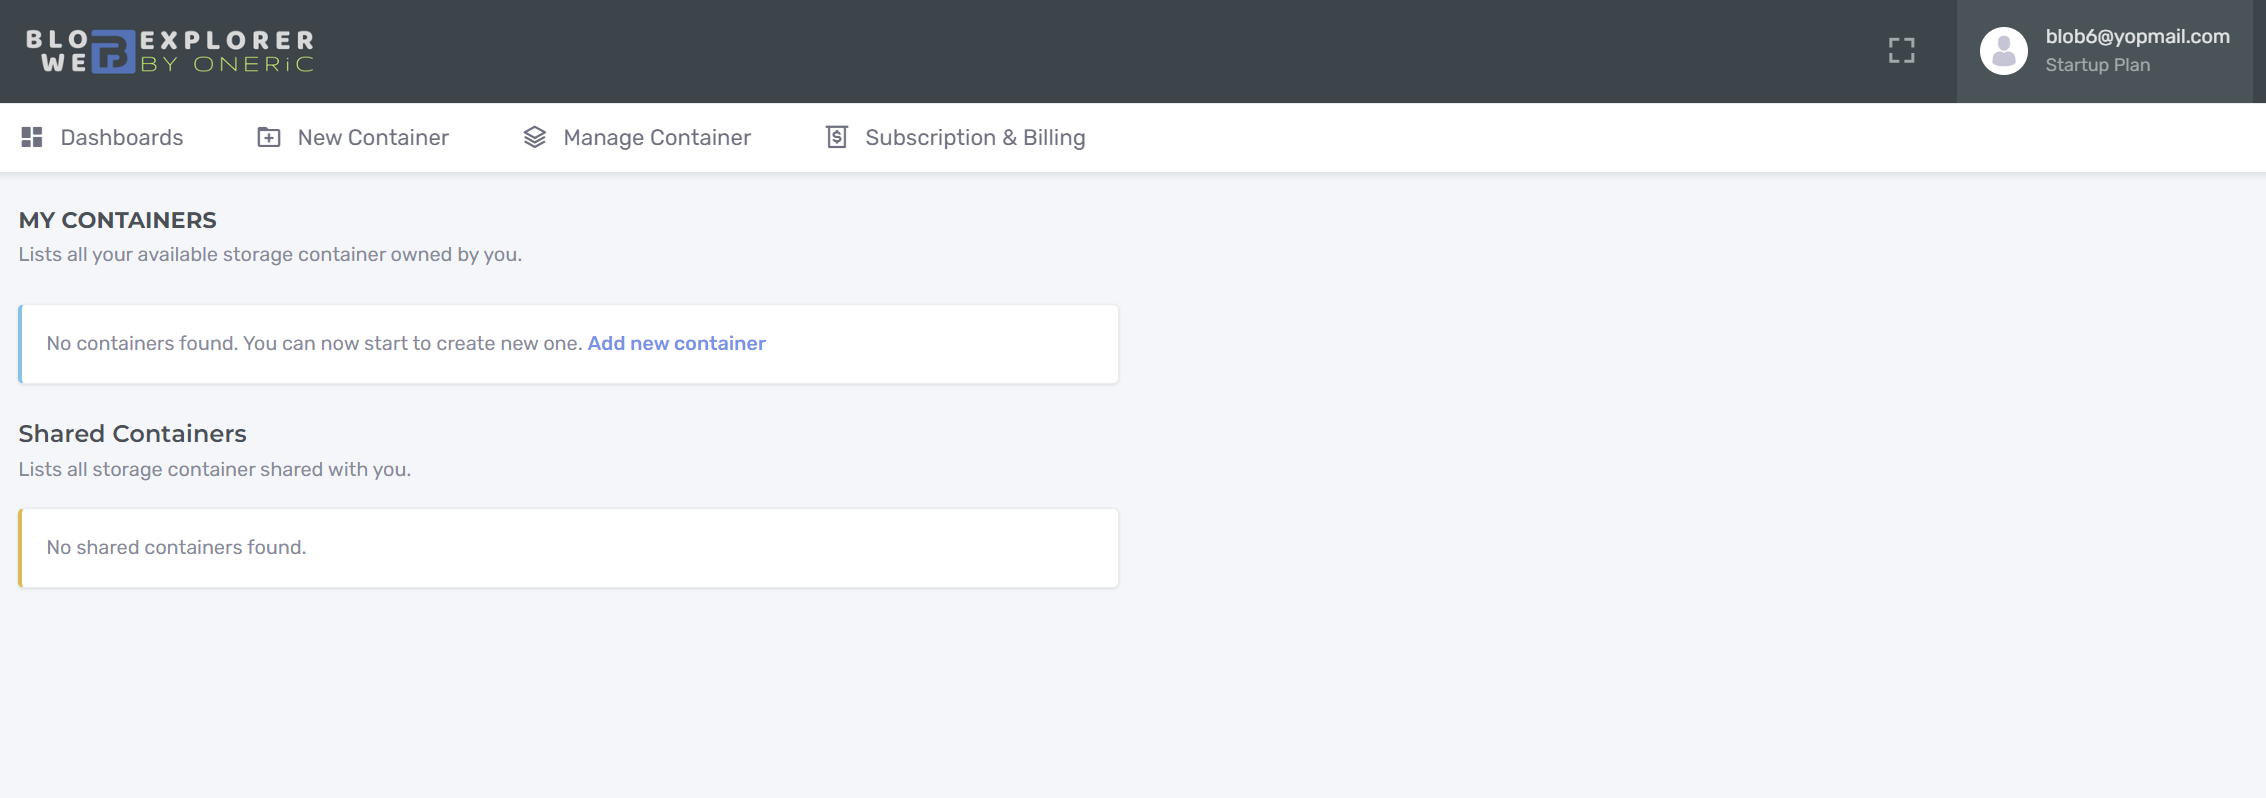
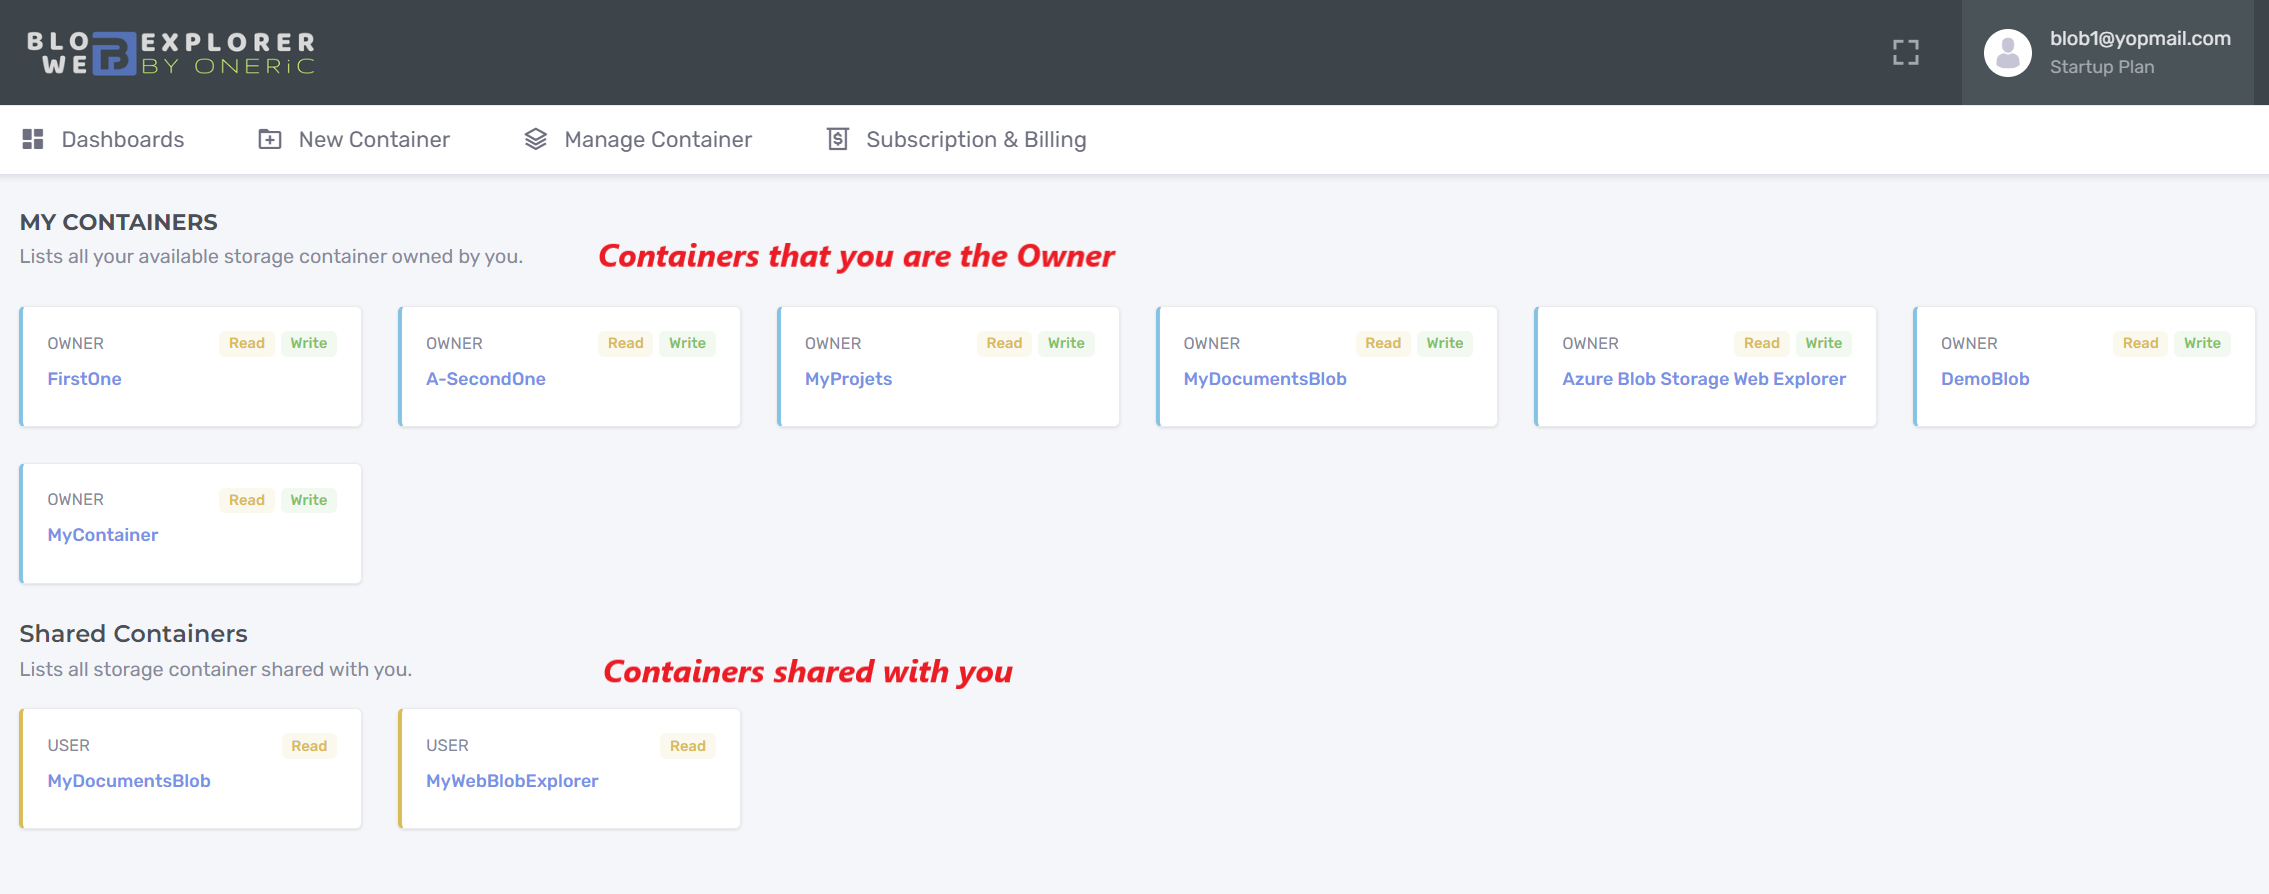
The Dashboard lists all the containers available to you, it is divided in two parts:
- The first part is for the Containers that you are the Owner
- The second part is for those shared with you as a User
Blob Explorer
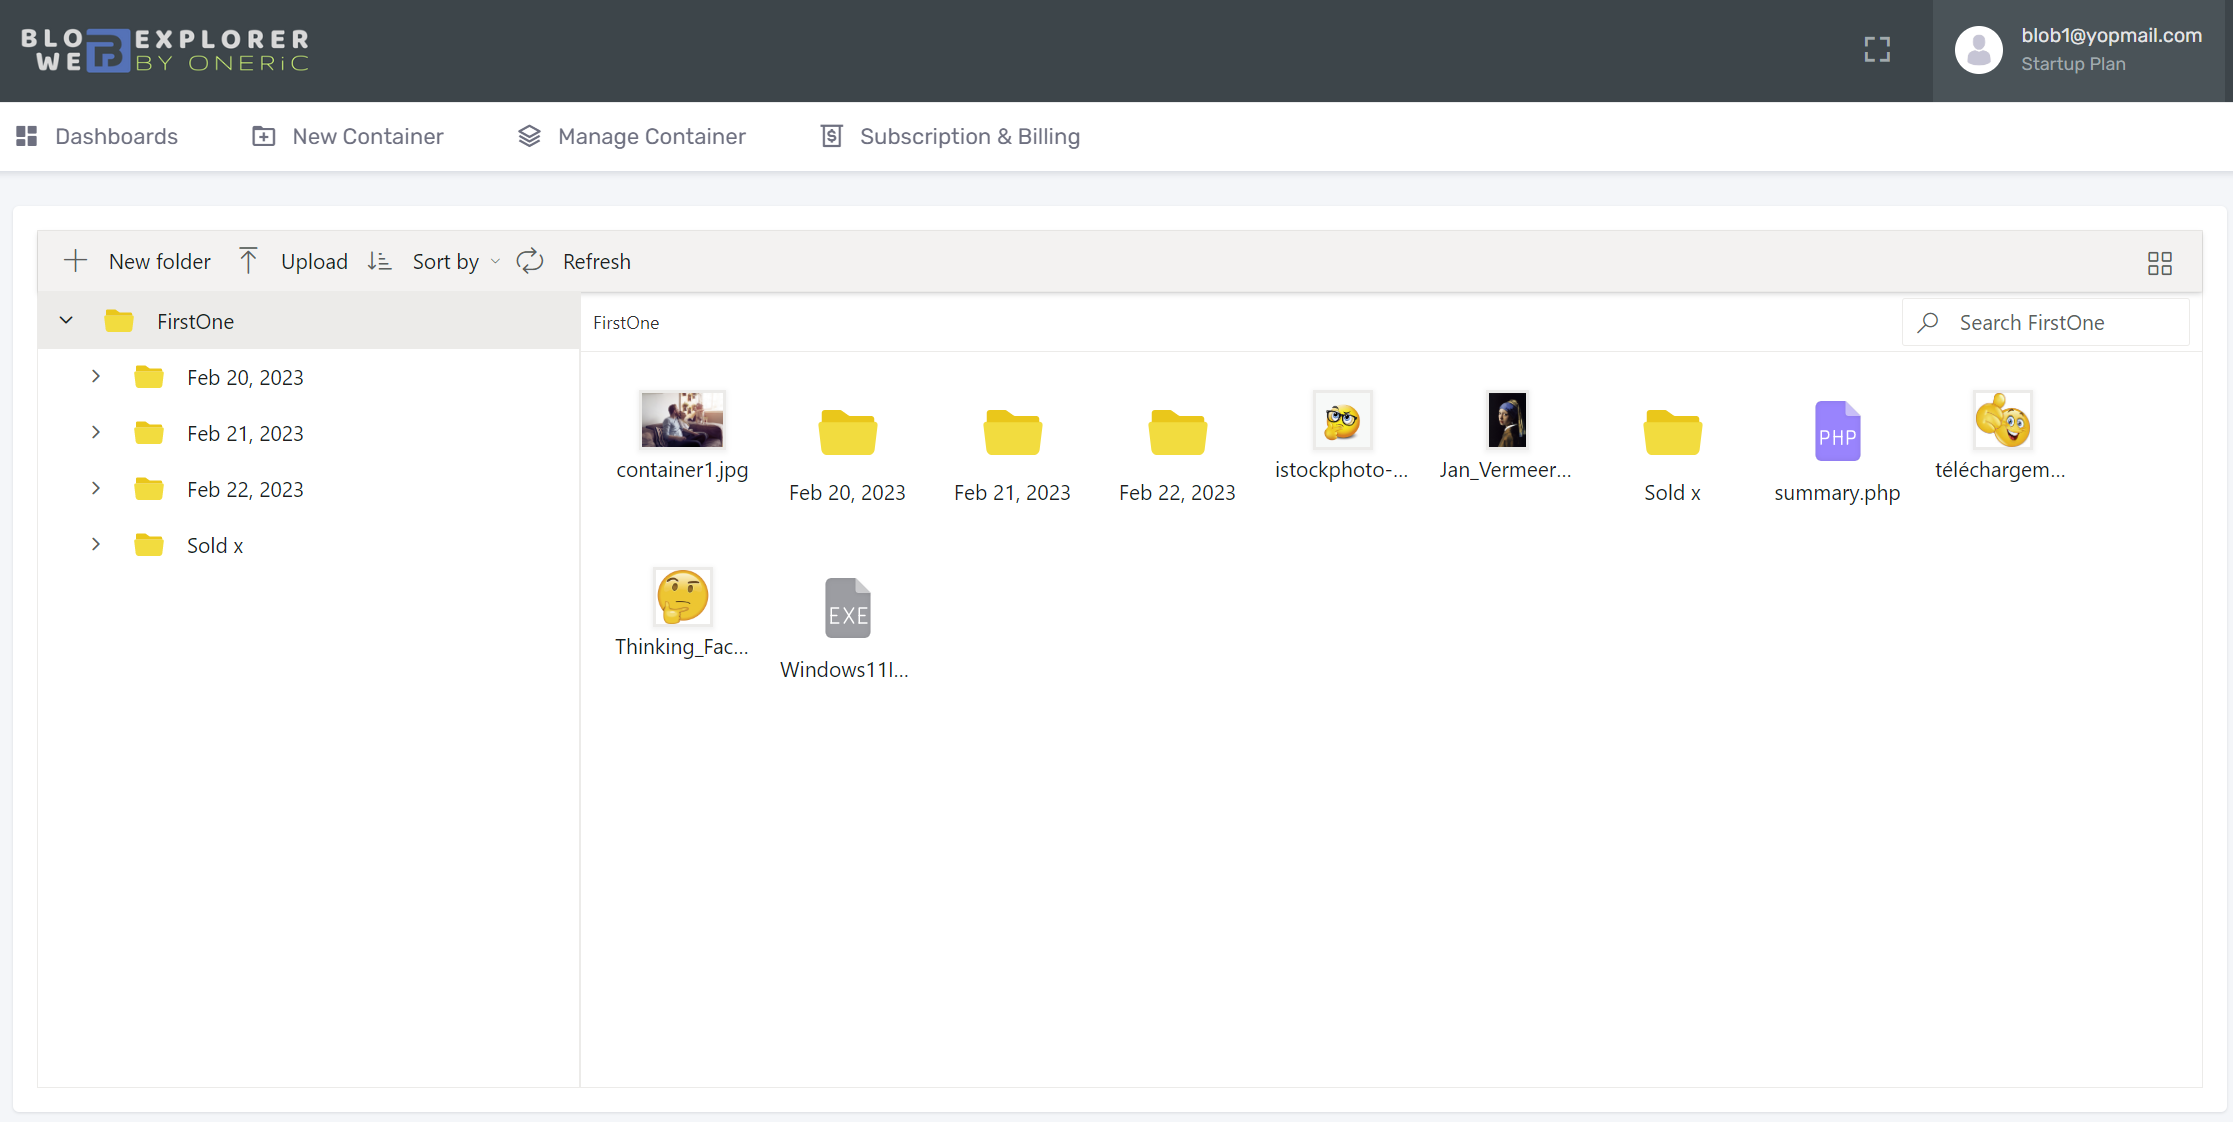
After adding the container, you can start explore your blobs. Blob Explorer let you manage your Blob Container as a simple file explorer.
User Interface
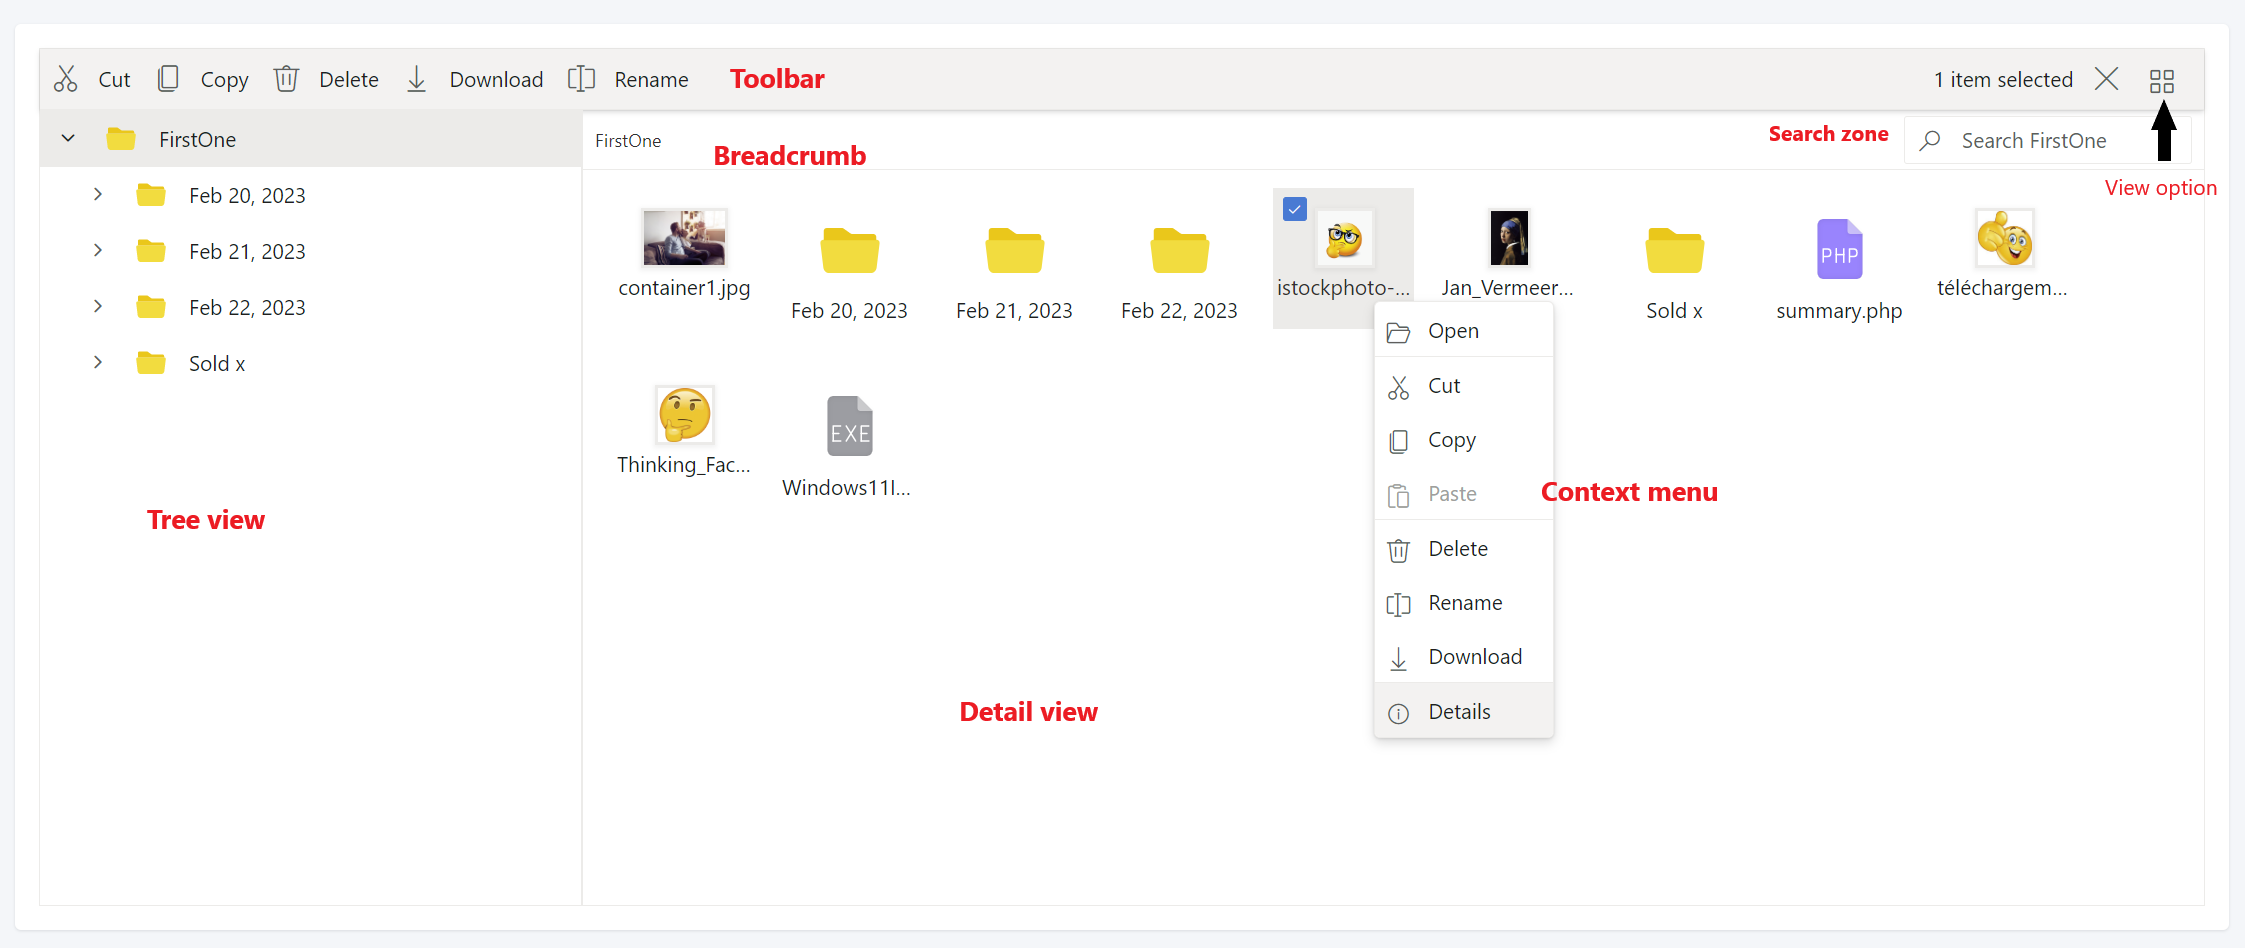
The blob explorer interface provides a familiar and intuitive way of interacting with the blob container, making it easier for users to navigate and manage their data. Users can upload, download, move, copy, or delete files and folders in the containers.
Toolbar
The Toolbar provides easy access to the file operations using different buttons and it is presented at the top of the file manager.
Tree view
The Tree View displays the folder hierarchy of the file system and provides easy navigation to the desired folder.
Breadcrumb
The file manager provides breadcrumb for navigating to the parent folders. The breadcrumb the in file manager is responsible for resizing. Whenever the path length exceeds the breadcrumb length, a dropdown button will be added at the starting of the breadcrumb to hold the parent folders adjacent to root.
View
View is the section where the files and folders are displayed for the user to browse. The file manager has two types of views to display the files and folders.
Details view
In the details view, the files are displayed in a sorted list order. This file list comprises of several columns of information about the files such as Name, Date Modified, Type, and Size. Each file has its own small icon representing the file type.
Context menu
The context menu appears on user interaction such as right-click. The file manager is provided with context menu support to perform list of file operations with the files and folders. Context menu appears with varying menu items based on the targets such as file, folder (including navigation pane folders), and layout (empty area in view).
File Management
The following table represents the operations available in blob explorer :
| Action | Description | Role Classification |
|---|---|---|
| search | Searches for items matching the search string in the current and sub folders | Read |
| read | Read the content of files or folders available in the given path | Read |
| create | Create new folder in the current path | Write |
| delete | Delete files or folders | Write |
| copy | Copy selected file or folder to target path | Write |
| move | Cut selected file or folder | Write |
| rename | Rename the selected file or folder | Write |
| download | Download one or multiple file from blob storage | Read |
| upload | Upload file to the current path in blob storage | Write |
Manage Container
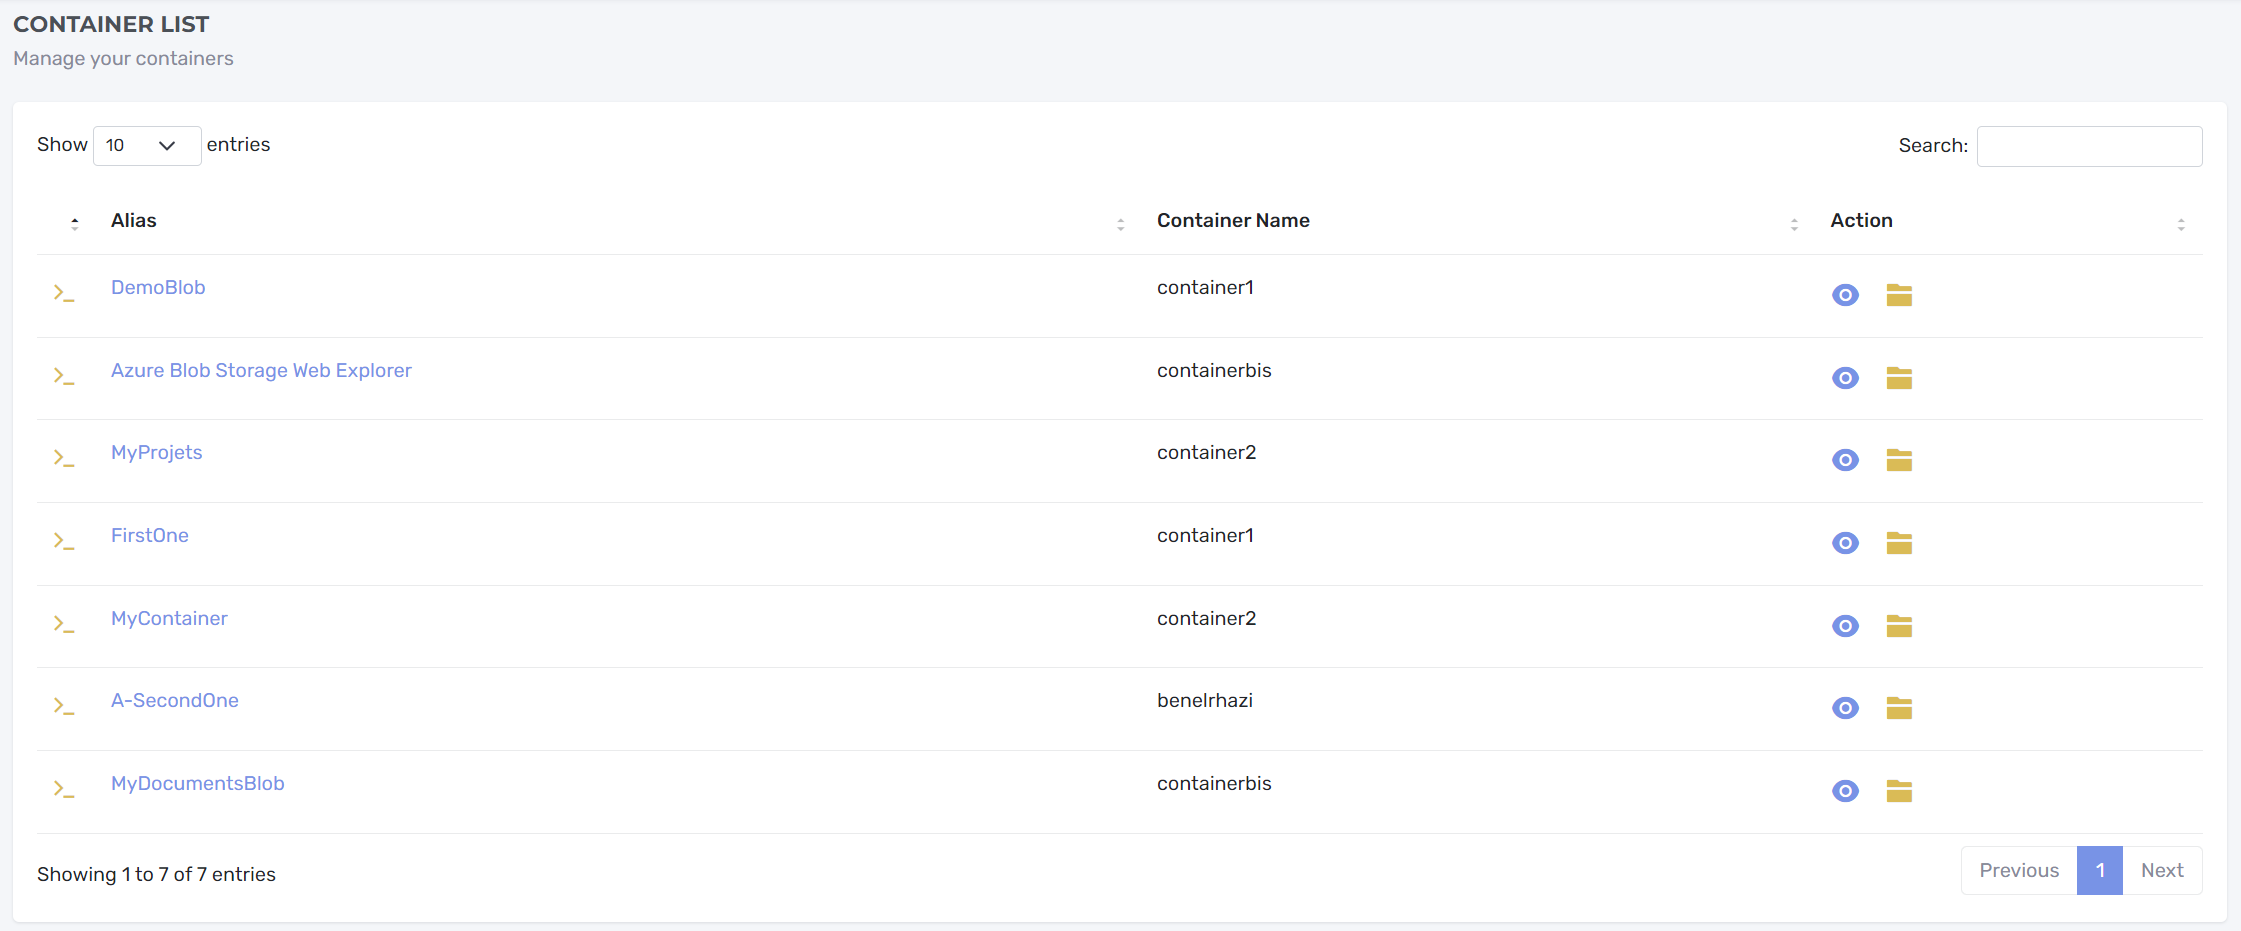
To manage your containers :
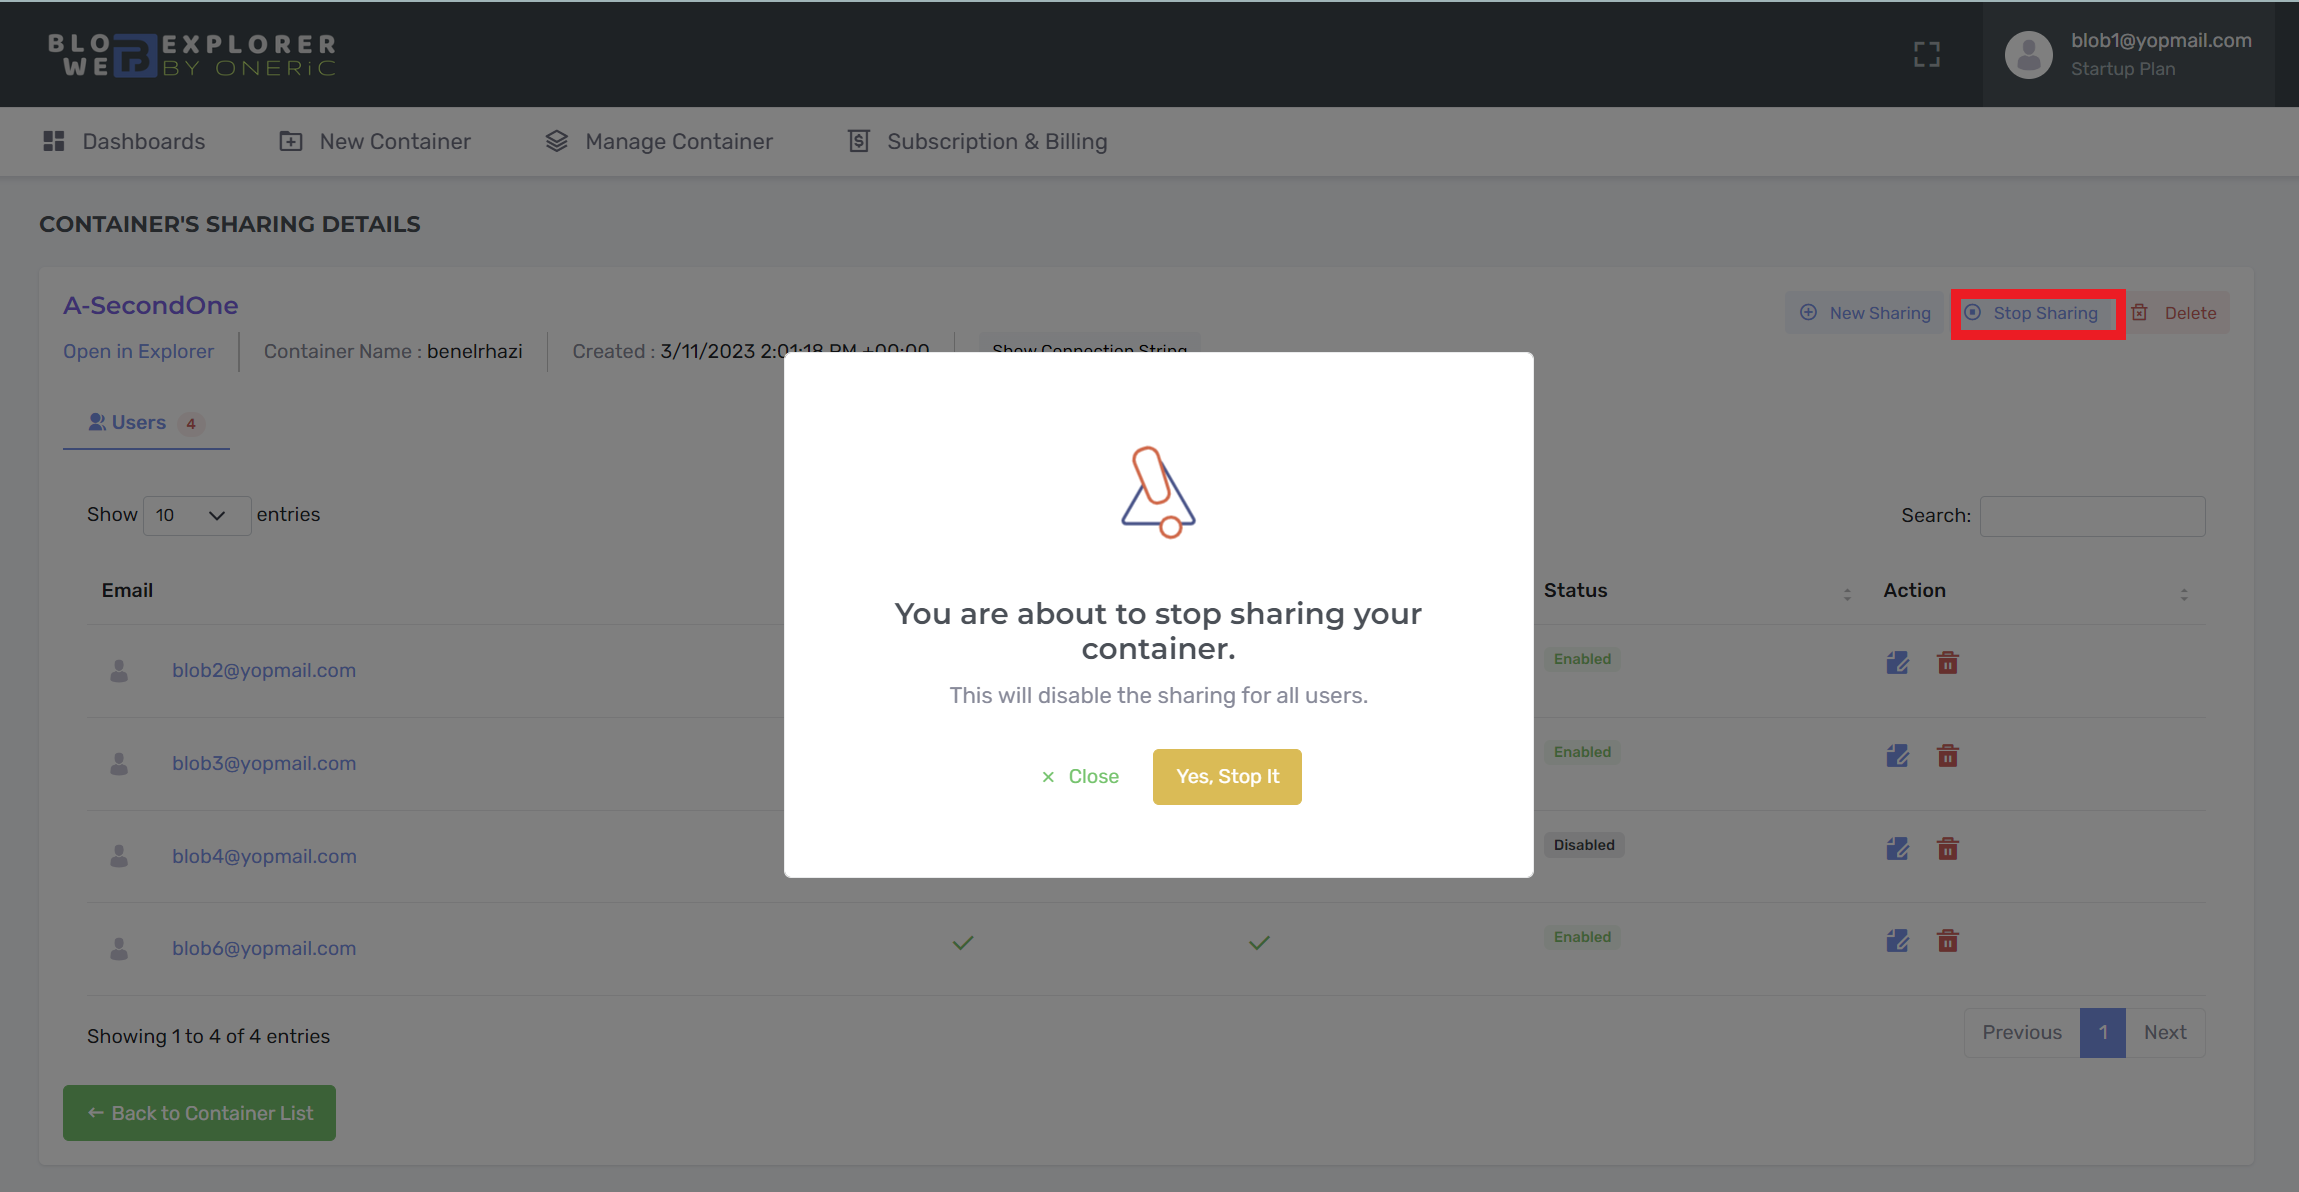
Stop Sharing
Stop Sharing button allow you to stop sharing your container with all users they use.
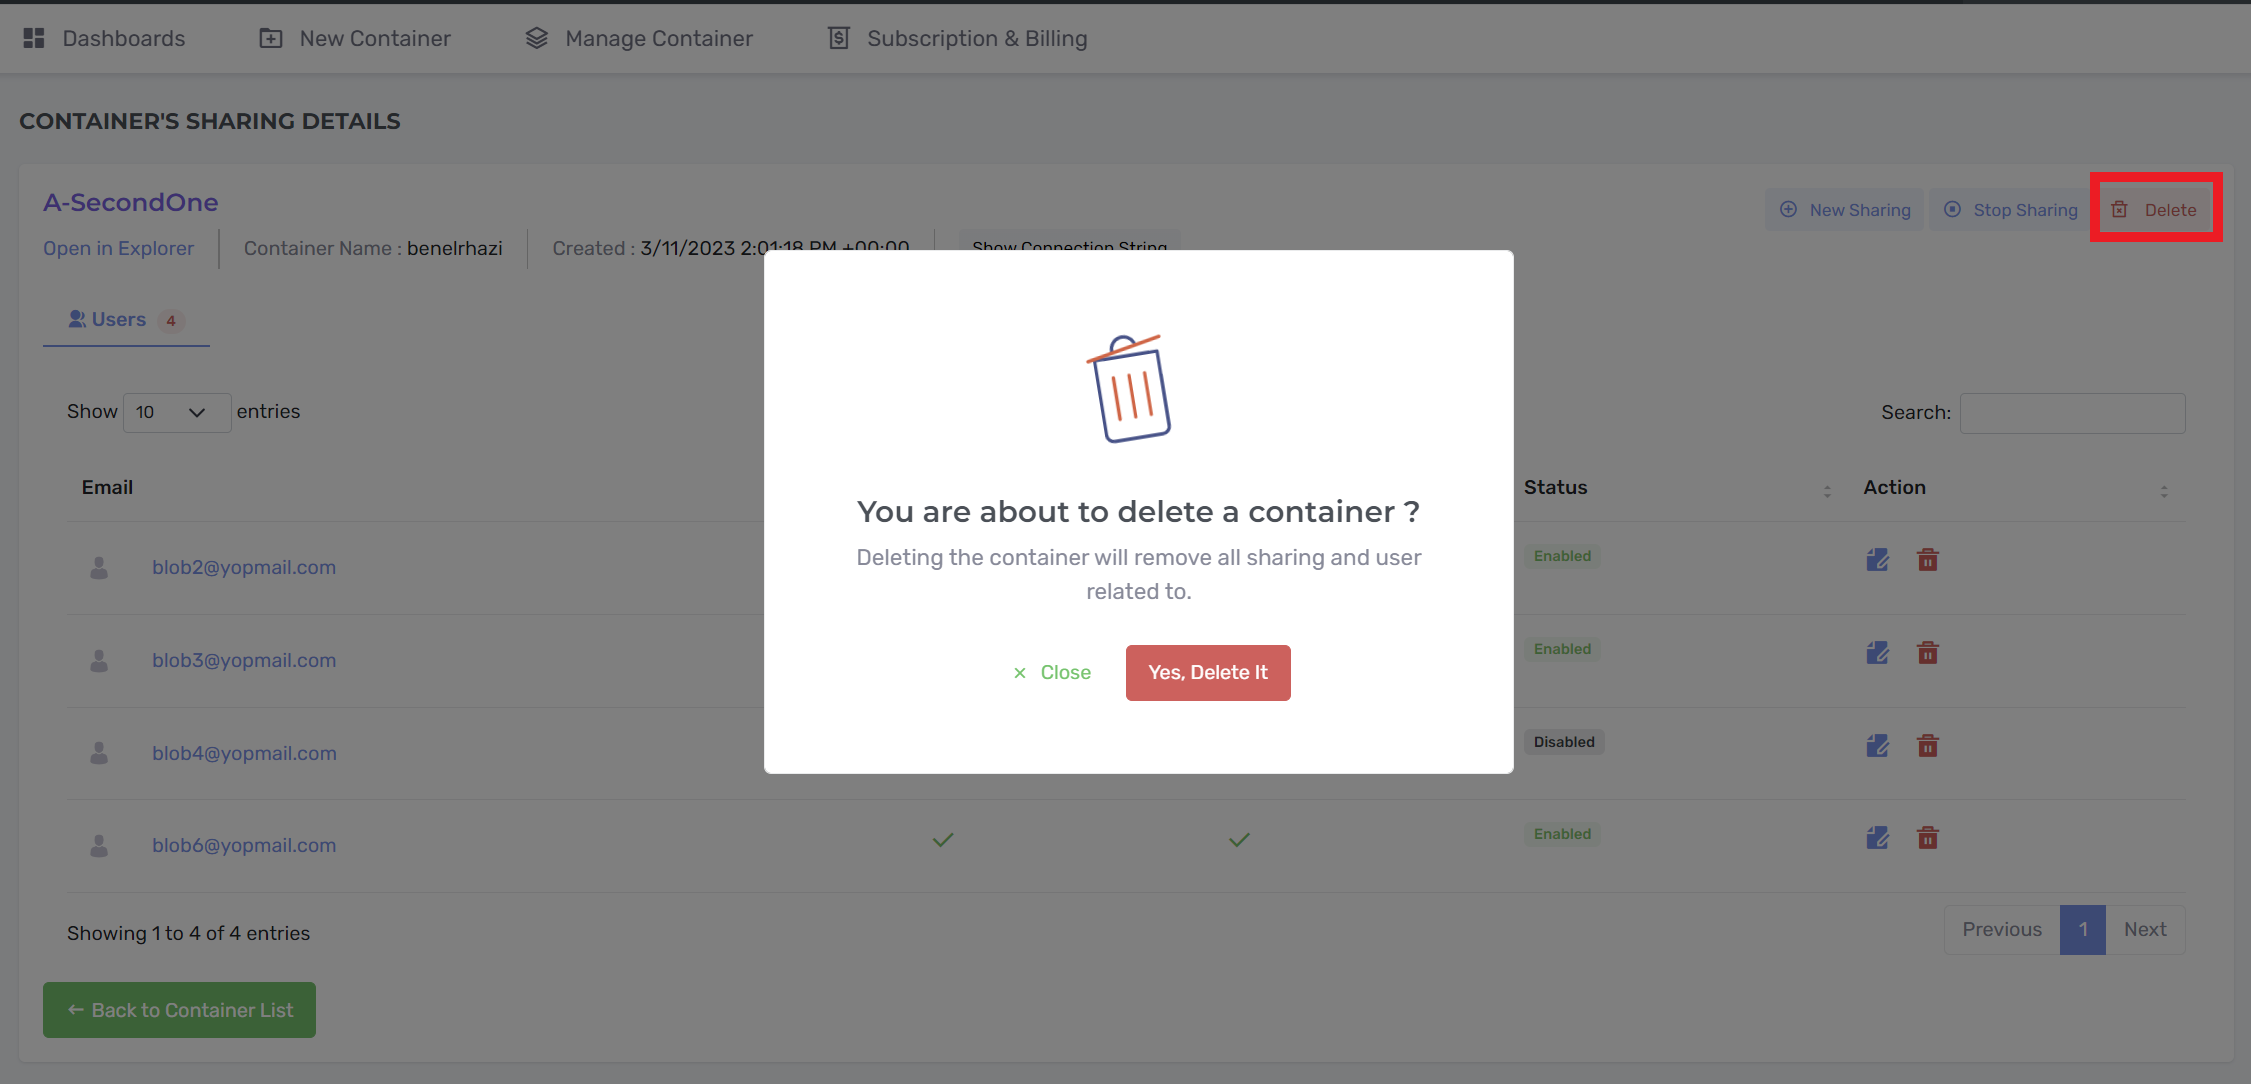
Delete Container
Delete Container causes the deletion of all the information of the container and also remove all shares.
Subscription & Billing
There are several subscription plans in Blob Web Explorer application that you can subscribe to. Subscription and Billing are managed by Stripe Customer Portal. Stripe Customer Portal Documentation
Pricing Plan
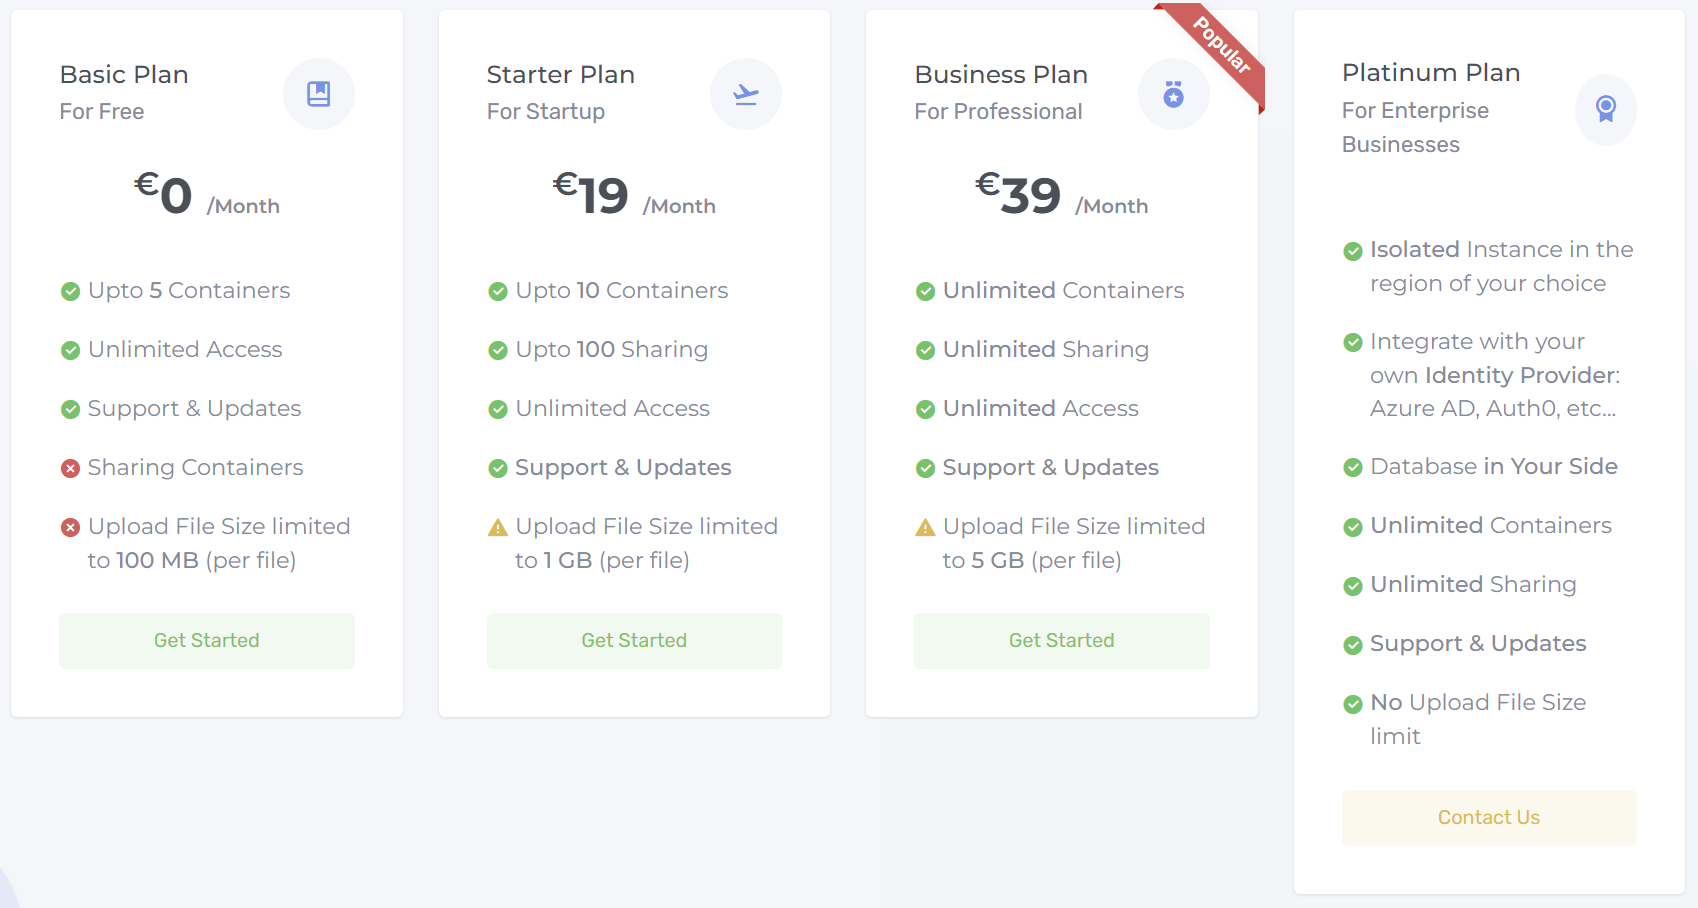
Here is the pricing table:
When you register to Blob Web Explorer the Free Plan is assigned to you by default. This plan has no access limit in time.
Subscribe to Plan
If you want to subscribe on one of our plans:
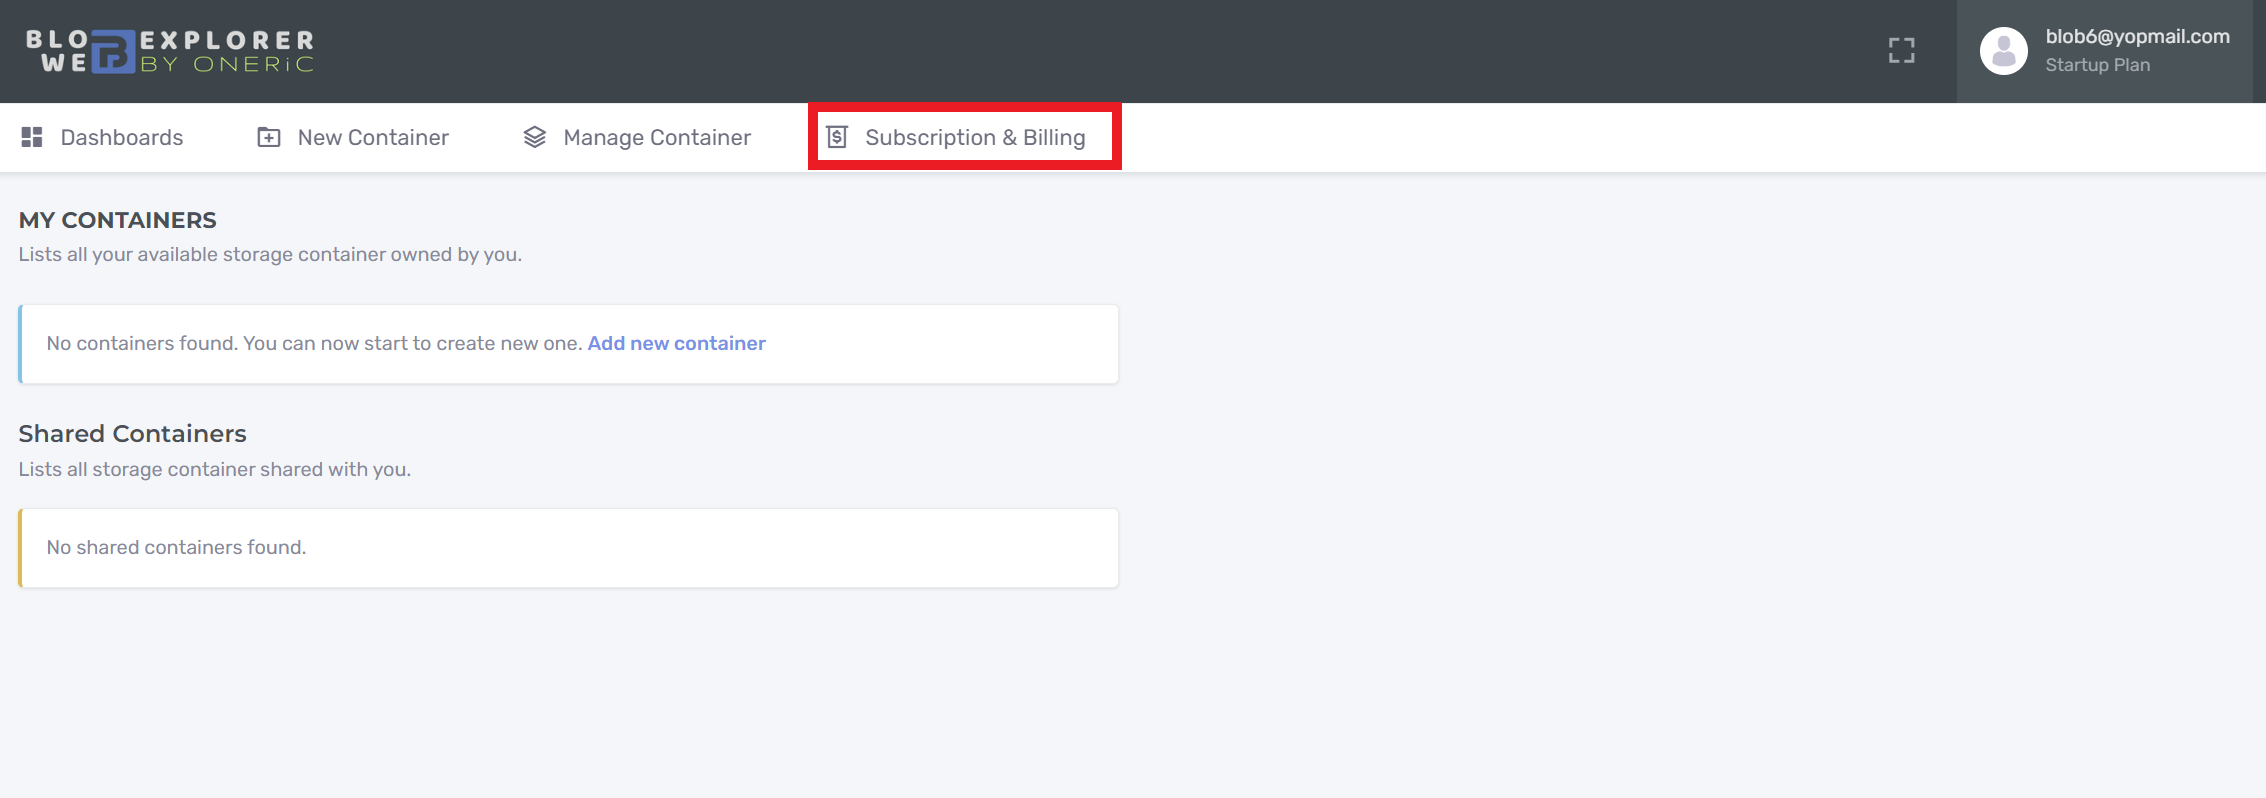
- Click on "Subscription & Billing" menu
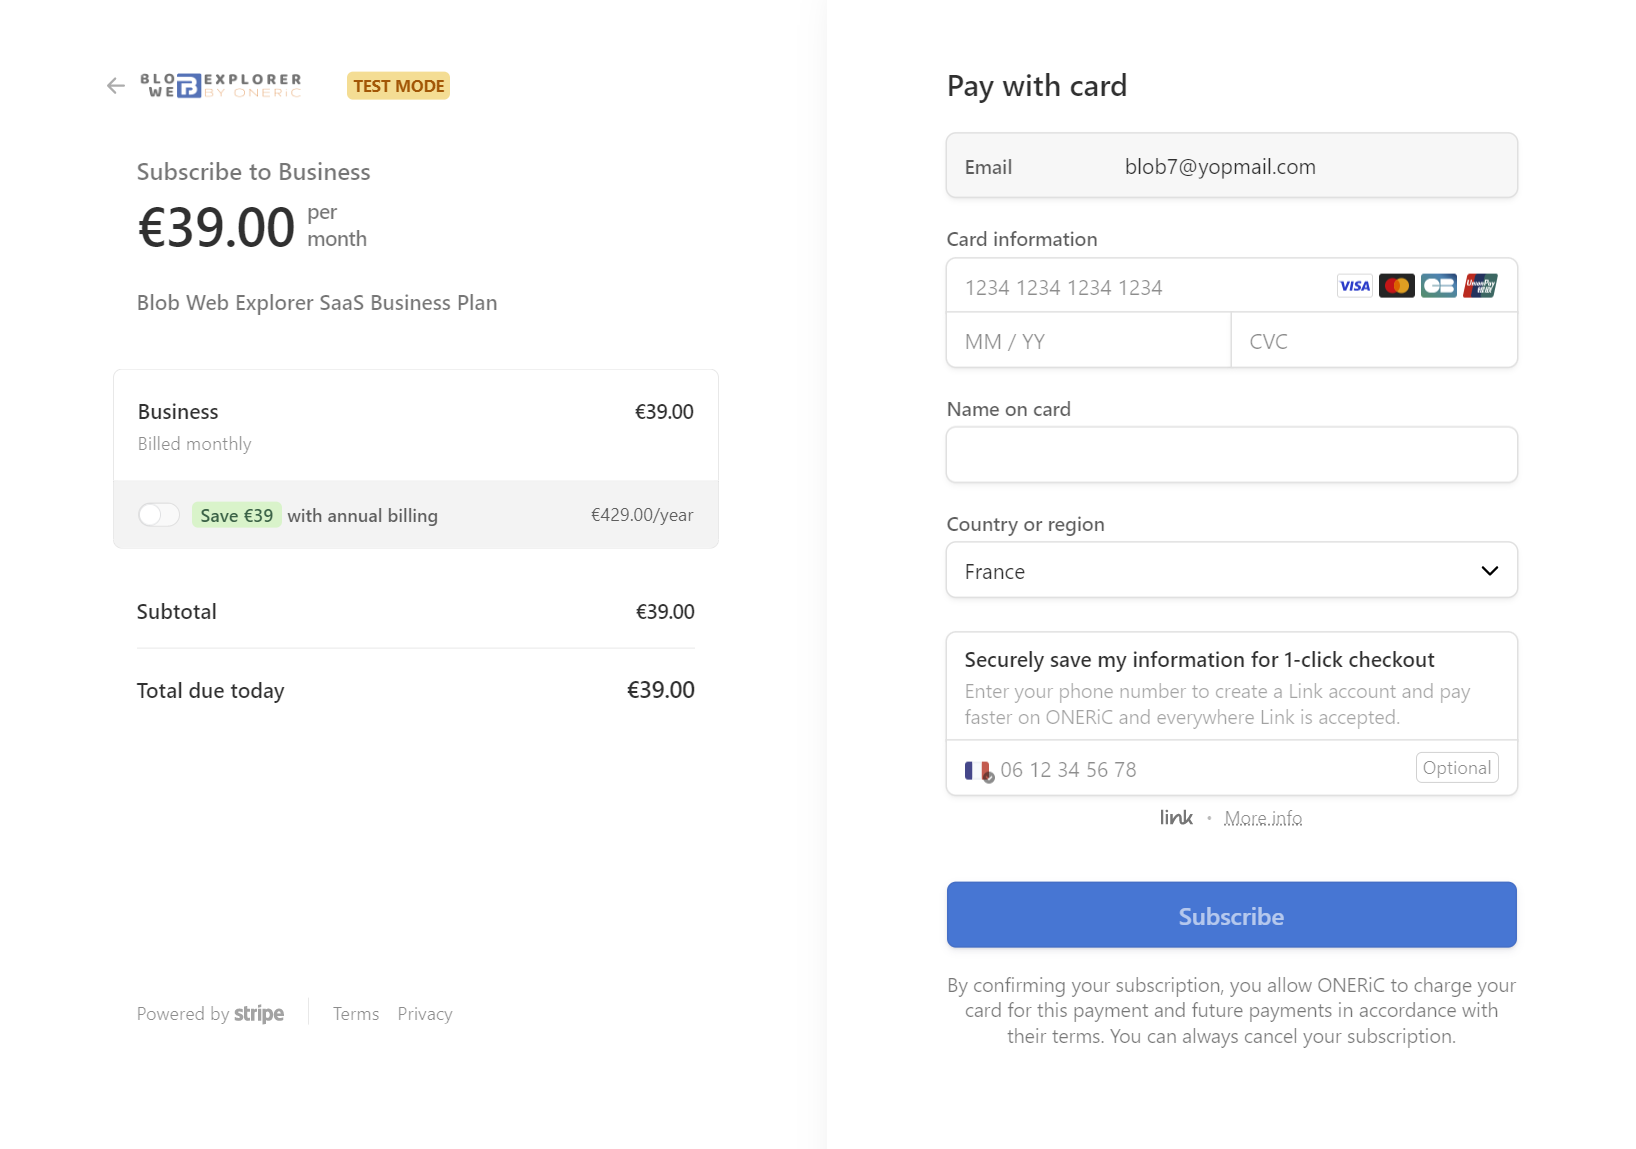
- Choose your plan and click "Subscribe", you will be redirect to our payment partner Stripe.
- Fill your card information and your Country.
- Finally, click on Subscribe to validate your payment
- You will receive an email with payment detail: payment receipt and an invoice
Update your Subscription
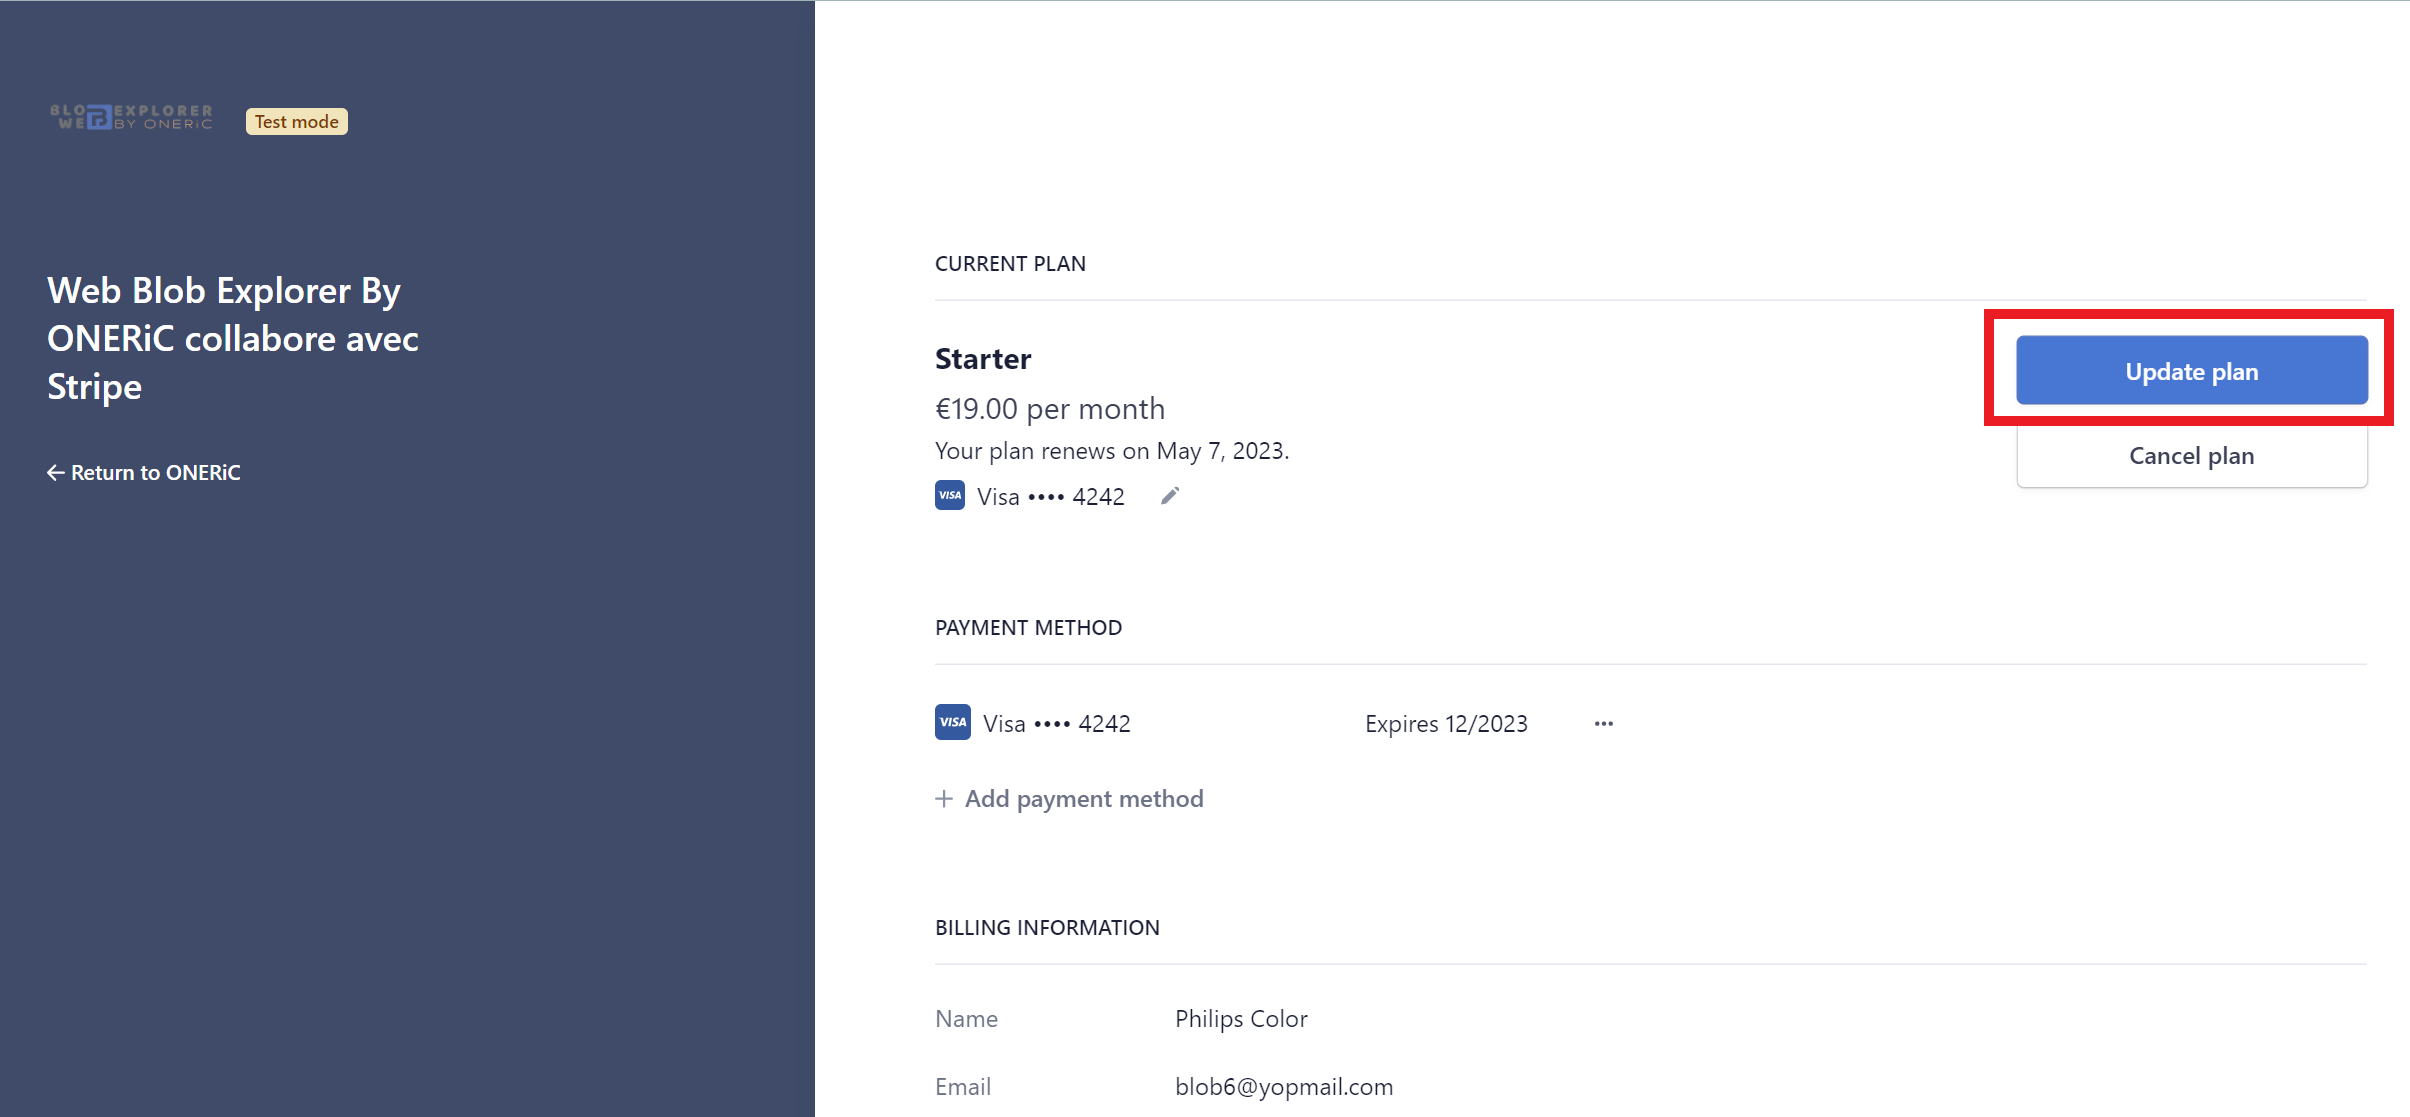
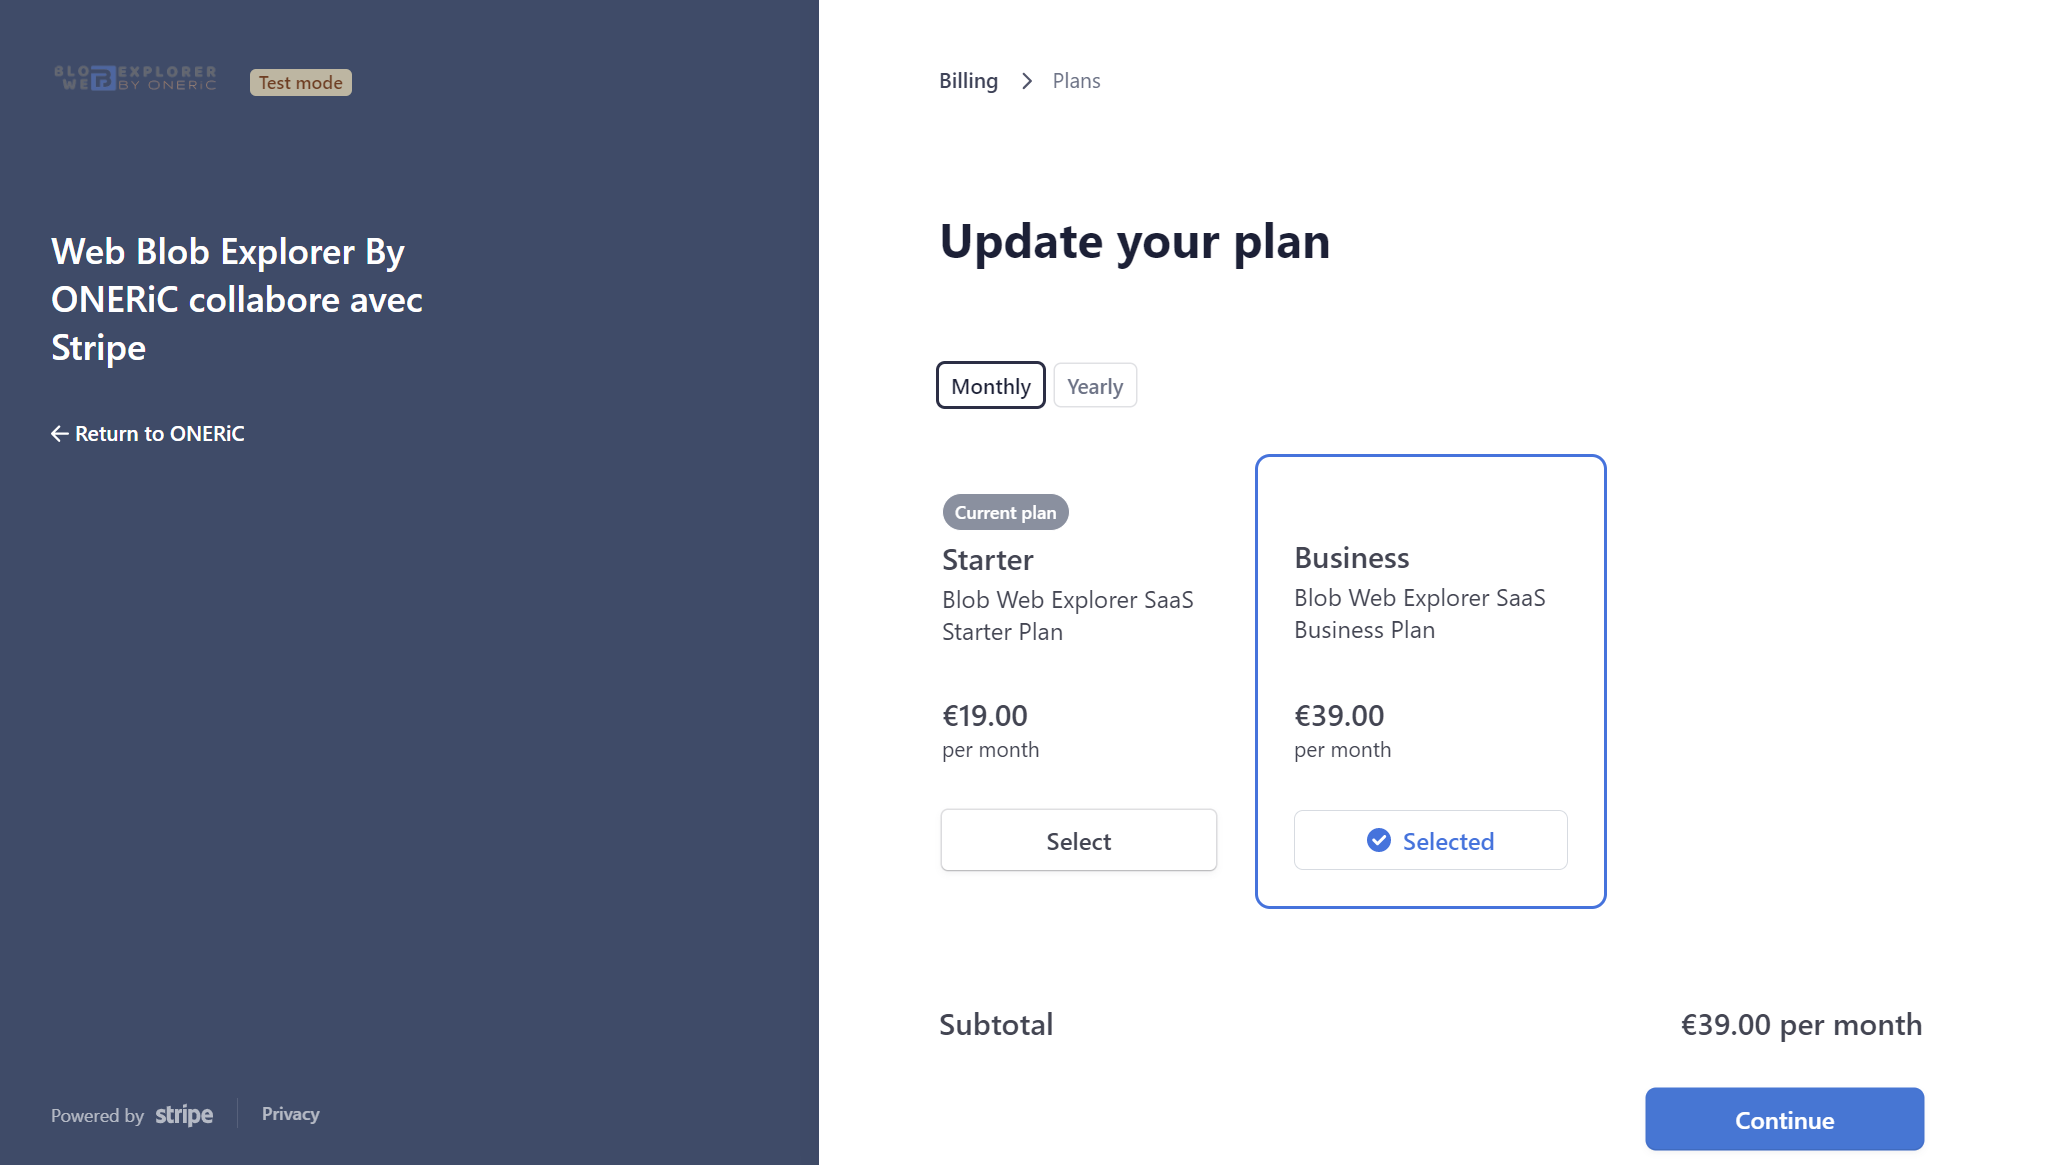
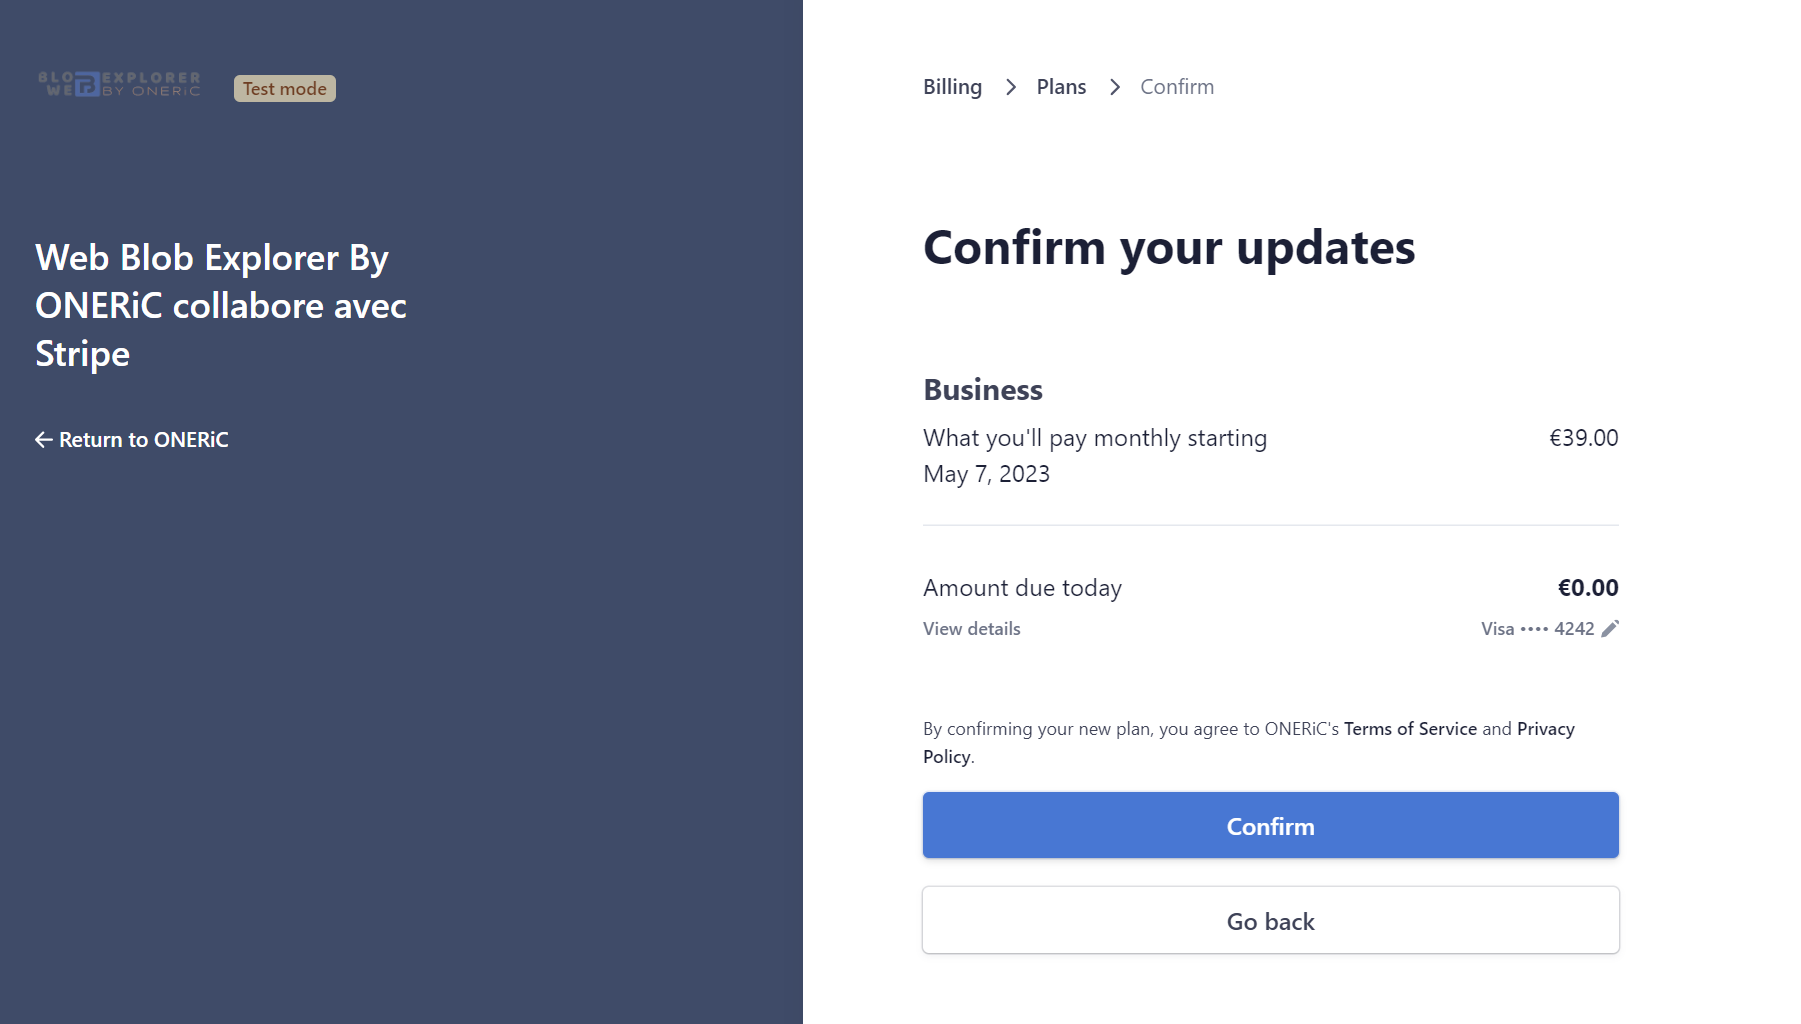
With the customer portal you can update your subscription by upgrading or downgrading your plan and also manage your billing.
- After your first subscription you can click on "Subscription & billingé menu or "Billing" on account context menu.
- Click to Update plan and choose the new plan and confirm, you will billed on pro-rata basis.
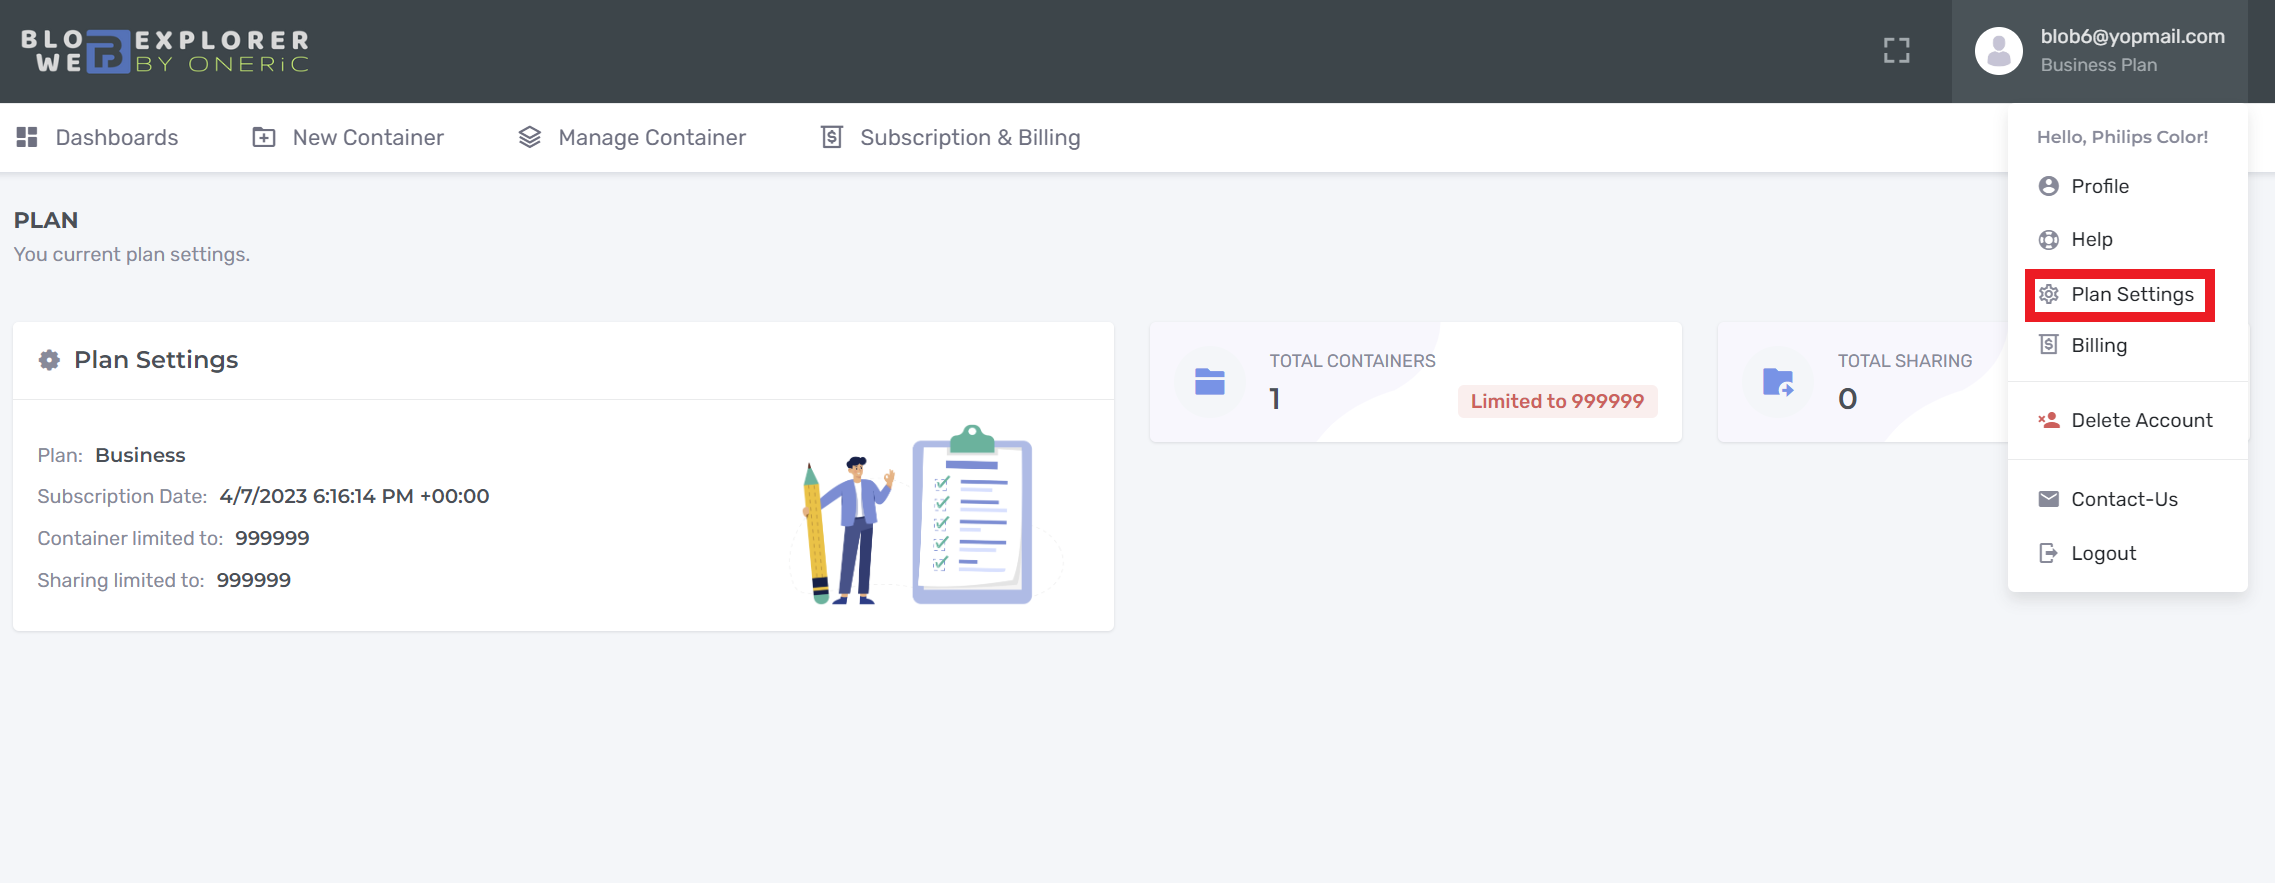
- You can check your current plan parameter by clicking on "Plan Setting" account contextual menu.
Cancel Subscription
With the same portal you can cancel your subscription whenever you want.
Billing
You can find and download all your invoice history on customer portal.
Support
If this documentation doesn't answer your questions, So, Please send us Email via Contact Page
We are located in GMT +2:00 time zone and we answer all questions within 12-24 hours in weekdays. In some rare cases the waiting time can be to 48 hours. (except holiday seasons which might take longer).
Changelog
See what's new added, changed, fixed, improved or updated in the latest versions.
Version 2.0 (06 November, 2024)
- Added Support link container by SAS Url
- Fixed Empty folder created in Azure Storage Account GEN2
- Fixed Order container list by created date
Version 1.2 (08 May, 2023)
- Added Optimizing upload files
- Fixed Send email in contact us form
- Updated Packages to Latest version
Version 1.1 (17 April, 2023)
- Added Upload file size limit per plan
- Fixed Upload large file
Version 1.0 (26 March, 2023)
Initial Release
